Gore Medium Body Steel String Guitar blog:
April 18th 2014
The epoxying of the neck block went OK. Everything seemed to be in the right place and glued down
.jpg)
.jpg) Not have a special form for gluing making laminated linings together and I decided, as suggested in the book to both glue the laminate together at the same time as gluing them to the rims. Before starting I knew that there going to be the need for a few clamps and as things slides around I would need some time to get everything clamped tight and the bindings at least close to level, I decided to use fish glue. It is great stuff but it likes to stay clamped for 12 hours.
Not have a special form for gluing making laminated linings together and I decided, as suggested in the book to both glue the laminate together at the same time as gluing them to the rims. Before starting I knew that there going to be the need for a few clamps and as things slides around I would need some time to get everything clamped tight and the bindings at least close to level, I decided to use fish glue. It is great stuff but it likes to stay clamped for 12 hours.
In the first picture you can see that I made a caul for inside of the cutaway. As it was not perfectly bent some clamping force was required. In this picture if you look toward the center I used really cute 4" hand screw clamps to square up the stack of linings as I clamped along the stack.
.jpg) Ultimatly I am glad I had the time with the fish glue as there was some jockeying of clamps before I was happy. I started with the cutaway side. the neck day I did the non cutaway side.
Ultimatly I am glad I had the time with the fish glue as there was some jockeying of clamps before I was happy. I started with the cutaway side. the neck day I did the non cutaway side.
.jpg)
.jpg) The glue up went well on both sides. The rims are really stiff with the linings installed. A noticeable difference from regular kerfed linings.
The glue up went well on both sides. The rims are really stiff with the linings installed. A noticeable difference from regular kerfed linings.
Using a block plane and my radius dishes I profiled the back and top rims. First the top, and then I measured the heieght I wanted at the center of the blocks and used my poster board rim profiles to draw a rough profile where the back rims would be. When I started my neck block was a bit over 10 mm long, so I actually took the body to the band saw to cut the back profile a bit closer.
.jpg)
.jpg) Now I need to put the kerfed linings on the back rims, make and install the side reinforcement strips and make and install the side weight mount.
Now I need to put the kerfed linings on the back rims, make and install the side reinforcement strips and make and install the side weight mount.
April 29th 2014
I am getting close to finishing the rims. I still need to put the back in the radius dish again to clean up the kerfed linings and generally spend some quality time clean up the inside of the rims.
Today I added the kerfed linings for the back, installed the side splints and manufactured and glued on the mass support block. Somehow I did not take pictures making the mass support blocks but you will see them in the photos below. The mass support blocks will allowed me to add mass to sides to tune them a bit. More mass on the sides allows one to drop the top resonance frequency without little change to resonances. It is just a mahogany block with a nut in it. The book called out a t-nut, I used a brass insert (mainly cause I had them and did not have a t-nut. ), You can see it in the second picture.
As recommended I installed the kerfed linings in small strips and as you can see in the first and second picture I left room for the side splint. The side spint is inlet into the top linings and runs to the back. Ultimately they will be sanded with the back kerfed linings
.jpg) In the next few pictures you can see a mass support block. I have one on both sides.
In the next few pictures you can see a mass support block. I have one on both sides.
.jpg)
.jpg)
.jpg) In this picture I am preparing to glue (following picture) a strap tying the kerfed top lining to the end block. It is used to avoid a ripple that sometimes shows on a top where the linings join the end block. I will blend the strap into the linings, once the glue sets.
In this picture I am preparing to glue (following picture) a strap tying the kerfed top lining to the end block. It is used to avoid a ripple that sometimes shows on a top where the linings join the end block. I will blend the strap into the linings, once the glue sets.
.jpg)
.jpg)
May 4th 2014
I have the body components finished and am in the process of cleaning things up and fitting the top and back on to the rims. This guitar is designed to have an active back so I thinned the back down a bit more than I normally would, used the plans 3 meter radius (well I used 10 feet) and used the plans active bracing pattern.
Bracing the back was pretty straight forward, the one change in my procedures was I could not use the 10 foot radius dish to radius the braces. I found it too had to not roll over the sides a bit. Instead I used the 10 foot radius board I made to first mark the radius for using a plane and I finished up the braces in the other side of the radius board.
.jpg)
.jpg)
.jpg) The braces are all house shaped in their in profile. The book had a method of using a 22.5 degree router bit to shape the brace stock. I bought the bit but I found the process a little scary, so I used a chisel and a small plane to shape the braces.
The braces are all house shaped in their in profile. The book had a method of using a 22.5 degree router bit to shape the brace stock. I bought the bit but I found the process a little scary, so I used a chisel and a small plane to shape the braces.
Also the live back plan has a set of radial braces in the lower bout. I made a 30 degree square to set the brace location.
.jpg) A bit of chisel work shaped the braces
A bit of chisel work shaped the braces
.jpg) After a little bit of clean up I had the completed rims, top and back.
After a little bit of clean up I had the completed rims, top and back.
.jpg) The carbon fiber on the top kept the top in the prefect shape. Absolutely no spring back. There was even a bit of vacuum when I put the top on the radius board that the top was glued up in. A straight edge on the fret board extension area of the top gave me the perfect 2.5 mm at the saddle that I am looking for.
The carbon fiber on the top kept the top in the prefect shape. Absolutely no spring back. There was even a bit of vacuum when I put the top on the radius board that the top was glued up in. A straight edge on the fret board extension area of the top gave me the perfect 2.5 mm at the saddle that I am looking for.
When I fit the top to the rims it was easy to see that I made a little bit more longitudinal radius than I wanted. as the top needed to be pushed down about a mm at the blocks. It was hard to see this with the rims in the radius board as the neck block extension block the view. No big deal though. I carefully used a combination of a block plane and the radius board to take more off of the middle of the rims, until the top fit perfectly. It now sits on the rims requiring no pressure to hold it down. I also still have the correct body angle to match the required neck angle.
.jpg)
.jpg) I need to route the rims for the back braces, a bit more cleanup and I can close the box.
I need to route the rims for the back braces, a bit more cleanup and I can close the box.
May 10th 2014
I closed the box yesterday and today. I did the back first and the top today. In each case I used my radius dish as a gluing caul and cam clamps. I do not have the picture gluing on the back but the guitar was in the mold with spreaders holding the guitar square to the mold. One the back was on the rims with the solid linings for the top no longer need a mold.
.jpg)
.jpg)
.jpg)
.jpg)
.jpg) On to the bolt on bolt off neck ...
On to the bolt on bolt off neck ...
May 21st 2014
Before I can really start working on the neck I needed to get the body bound and the tail wedge installed. The binding, head stock veneer and tail wedge are all cocobola. I have a thin BWB fiber purfling that matches the rosette that I am using for purfling.
Normally I install the end wedge before I close the box. This time I did not; I started to mark out the wedge before I routed for bindings but stopped when I realized that it would be hard to judge the depth and with no purfling on the back it would be easy to cut into the back. The book has it cut out after binding the guitar, using a set of steel rulers, a marking knife and a chisel to chisel out the waste and to miter the side purflings. I decided that I am not the good with cutting and ultimately I cut and chiseled out the wedge after I cut the binding rebate but before the bindings were glued in. (sorry not a full set of photos.)
.jpg)
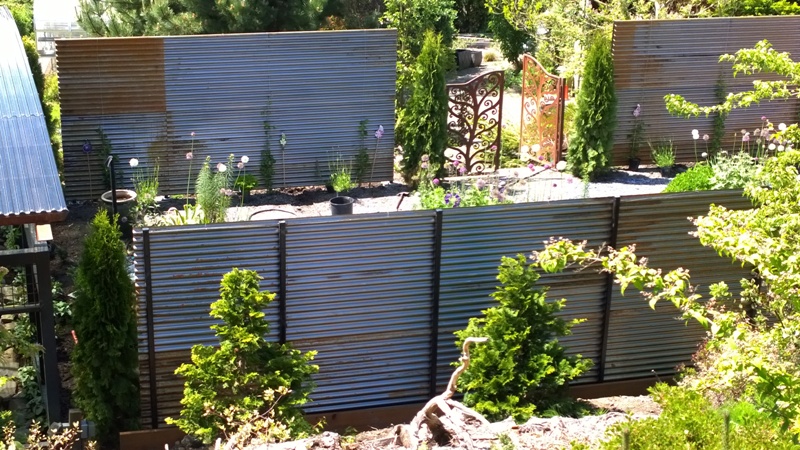
.jpg) I had to slow down my shop work to build a pretty substantial corrugated steel fence for the hidden sculpture garden my wife designed, 40' by 21' by 7'; mounted on 2" sqr steel posts. The fence is bolted on 24 10" round by 2.5' concrete filled post holes. She offered to hire someone, but I imagined the estimate. The steel will be left to rust and for the most part in short order there will be a lot of clematis and other plants. I had the steel posts custom fabricated. I think I am finished for this season!
I had to slow down my shop work to build a pretty substantial corrugated steel fence for the hidden sculpture garden my wife designed, 40' by 21' by 7'; mounted on 2" sqr steel posts. The fence is bolted on 24 10" round by 2.5' concrete filled post holes. She offered to hire someone, but I imagined the estimate. The steel will be left to rust and for the most part in short order there will be a lot of clematis and other plants. I had the steel posts custom fabricated. I think I am finished for this season!
.jpg)
 I finally got to bending the bindings for the cutaway one of the tasks that I have been nervous about. I did not have much luck my first try, so I sprayed the bindings with supersoft and waited a day. The super soft really helped, this cut away is really tight. On my previous cut away I softened the curves. Ultimately I did alright and got both bindings bent.
.jpg) I used high tack fish glue to bind the guitar. I like the slow cure time as it allowed me to bind, first the entire top, following it with a tight wrap. I used a continuous strip for the entire top purfling. I waited a few hours fit and then glued on the back bindings followed with a complete wrap of the guitar with the long rubber strip.
I used high tack fish glue to bind the guitar. I like the slow cure time as it allowed me to bind, first the entire top, following it with a tight wrap. I used a continuous strip for the entire top purfling. I waited a few hours fit and then glued on the back bindings followed with a complete wrap of the guitar with the long rubber strip.
.jpg)
.jpg)
.jpg)
.jpg)
.jpg)
.jpg)
.jpg)
Next Page
| 