DesignJeffrey Elliott / Hauser 1942 — open harmonic bar
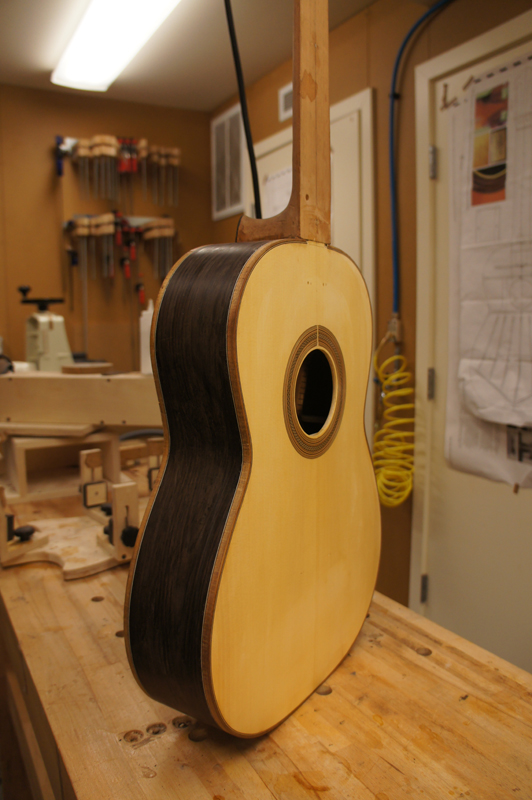
TopRed Spruce
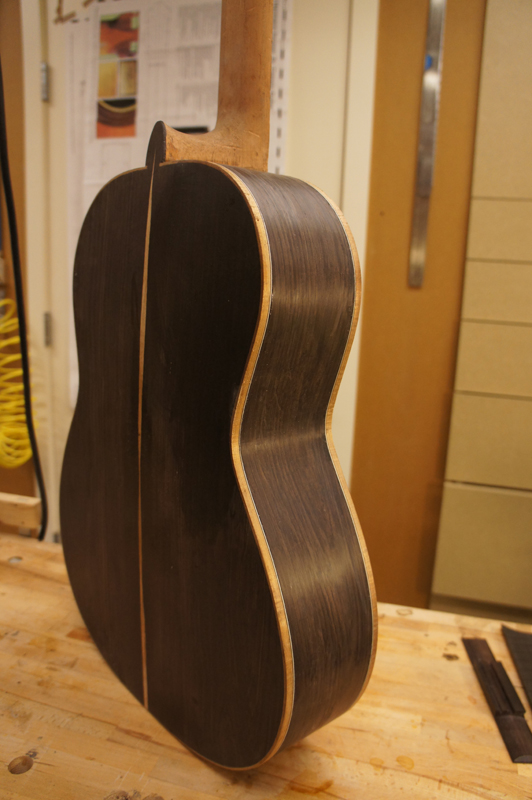
Back & SidesAfrican Blackwood (Dalbergia melanoxylon)
BindingsTasmanian Blackwood
FinishFrench Polish — Robbie O'Brien method
Build PeriodApril – August 2013
April 7th, 2013
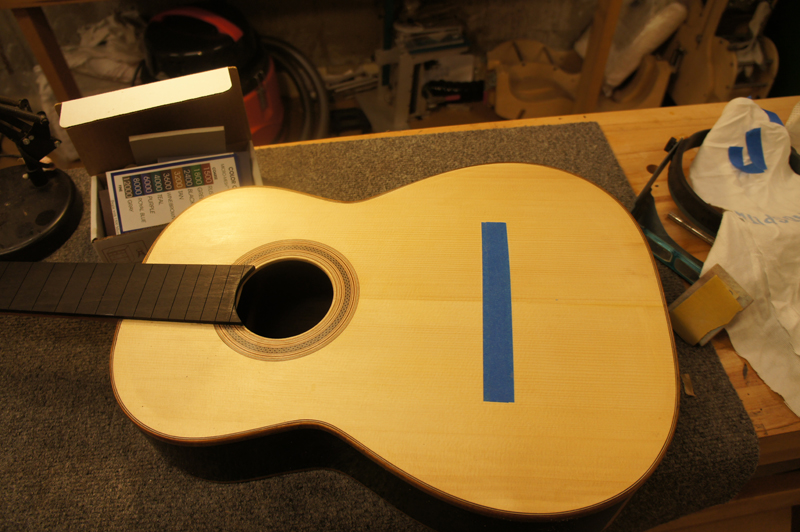
While joining plates and installing the rosette for my Martin 00 build, I also joined plates and put a rosette into an Adi top with jointed African Rosewood back. I was going to build the two simultaneously — turns out I'm not that good — so after many months I pulled the wood down this weekend and started the classical guitar for real.
In between I had a two-day course with Jeffrey Elliott about voicing a classical guitar top. It was watch-only, but I learned an enormous amount. One of the most interesting ideas: he indexes all of the components that matter up front — index holes in his solera for the saddle location, a matching template to index the bridge, index holes near the heel block, and a complete storyboard with matching holes for the saddle, rosette center, 12th fret, and nut. What I like most is that he actually places his bridge before he even makes the body.
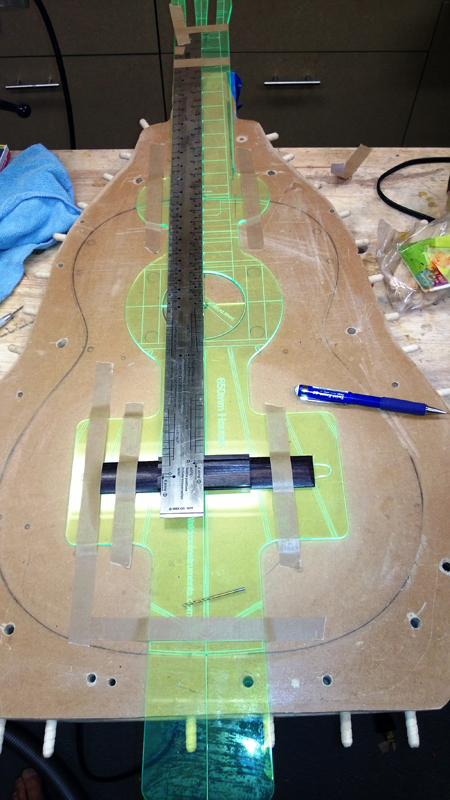
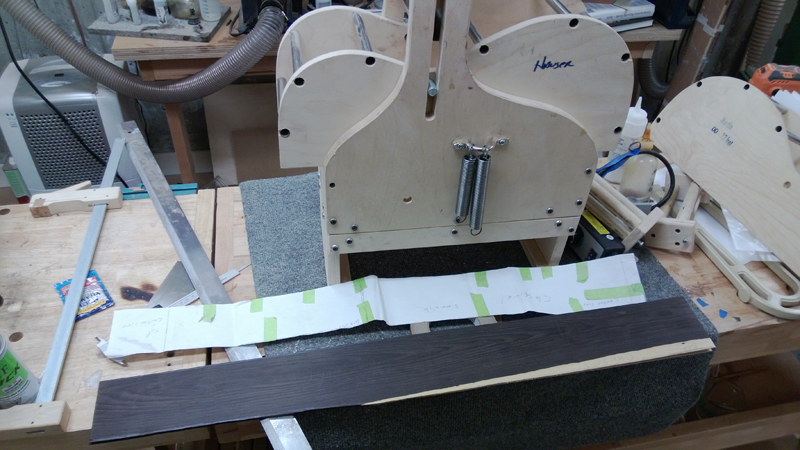
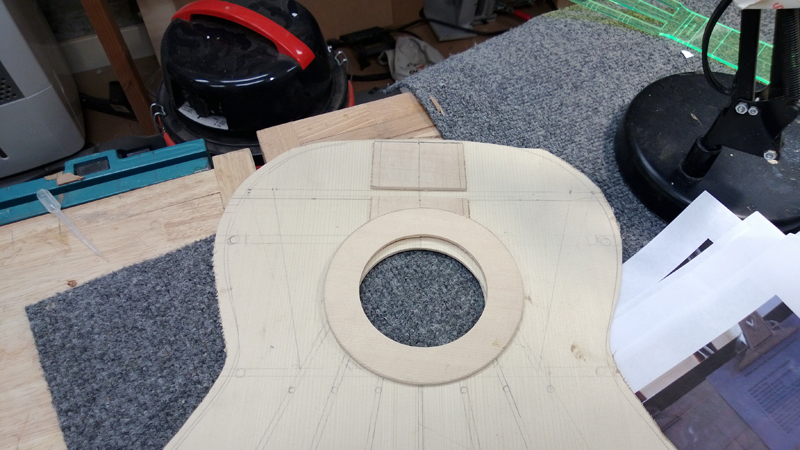
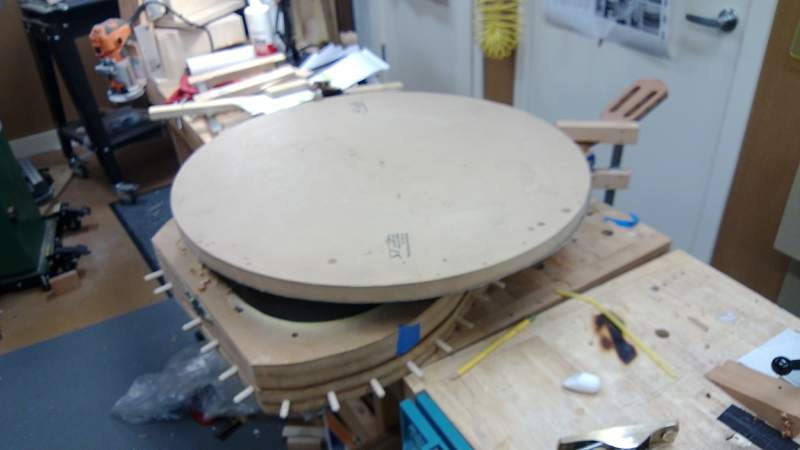
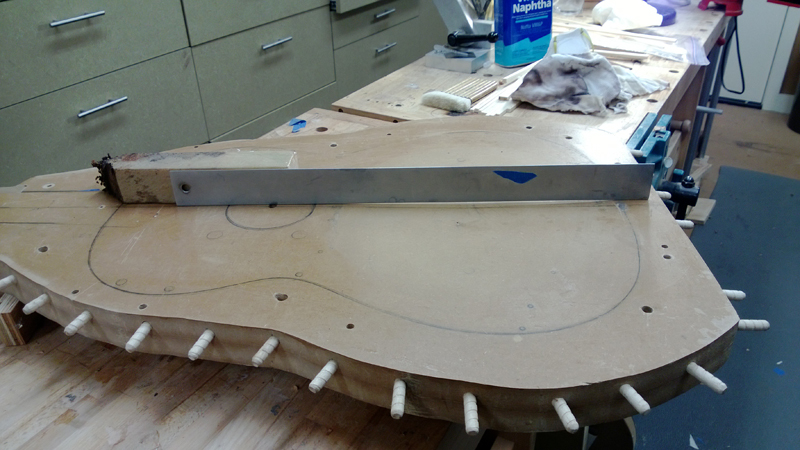
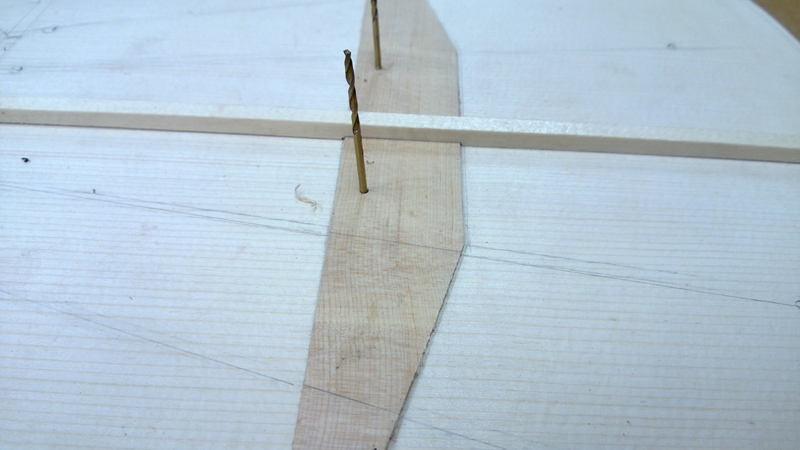
Jeffrey Elliott's Indexing SystemI located the proper saddle location on the storyboard and drilled index holes in the storyboard, the bridge, and my solera. I used the storyboard to drill index holes in the top as well — second try, as I needed to remember inside versus outside. I will also drill matching index holes in the neck template and a bridge template to mark the saddle location. With all of these templates I should be able to achieve real consistency.
The solera with index holes — bridge location already established before the body is made
To finish the evening I thicknessed the back and thicknessed and profiled the sides.
✦
April 21st, 2013
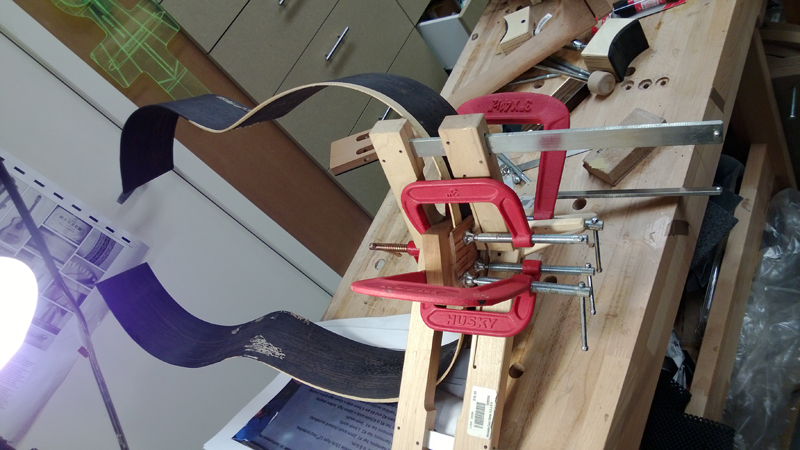
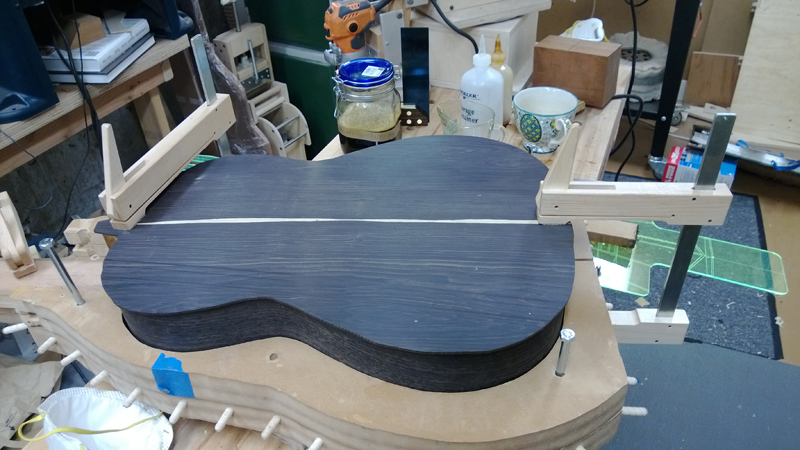
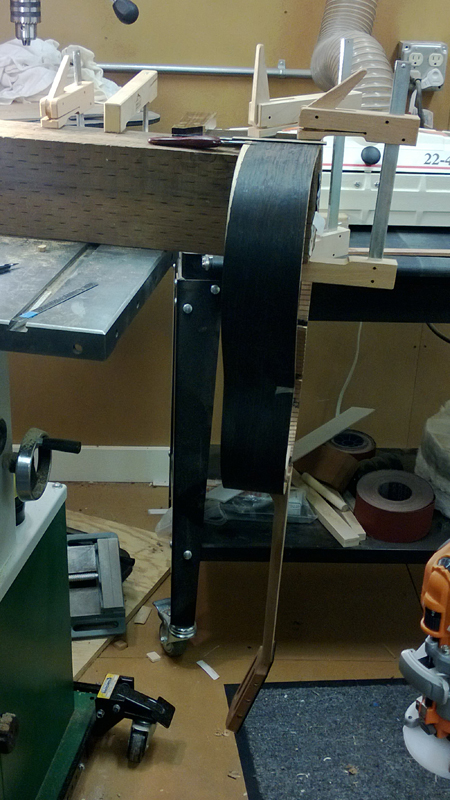
I got the sides bent without any issues — I was in no hurry, let them sit in the mold a bit, and ended up with nicely bent sides and little spring-back.
African Blackwood sides bent cleanly — patience in the mold paid off
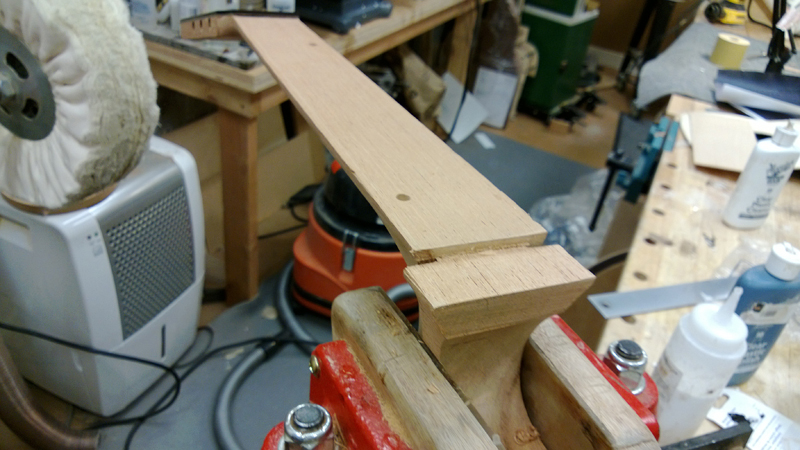
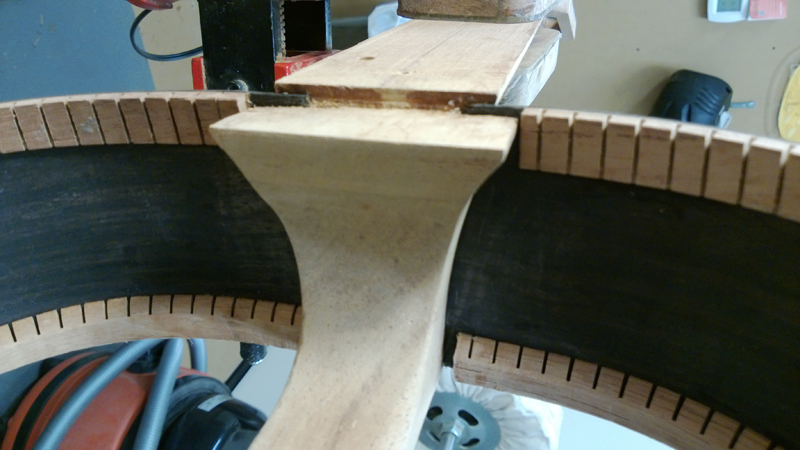
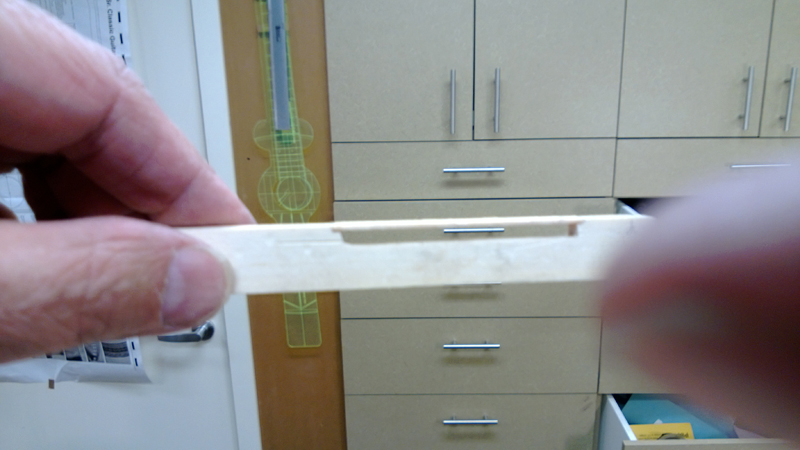
After that I made the bridge patch (1mm thick) and a fretboard patch (2.4mm thick). Some luthiers skip both, but given how many fine guitars have cracks along the fretboard, and since that area doesn't contribute to sound, I like to use one. Because I have a fretboard and the top of the guitar must be level with the face of the neck where the fretboard glues on, I needed to plane 5mm off the top side of the Spanish heel. Some use a router for this but I have a nice plane for the operation — work both sides stopping toward the middle, or you may blow out an edge.
Testing depth using the top and bridge patch stock — everything must land perfectly flush
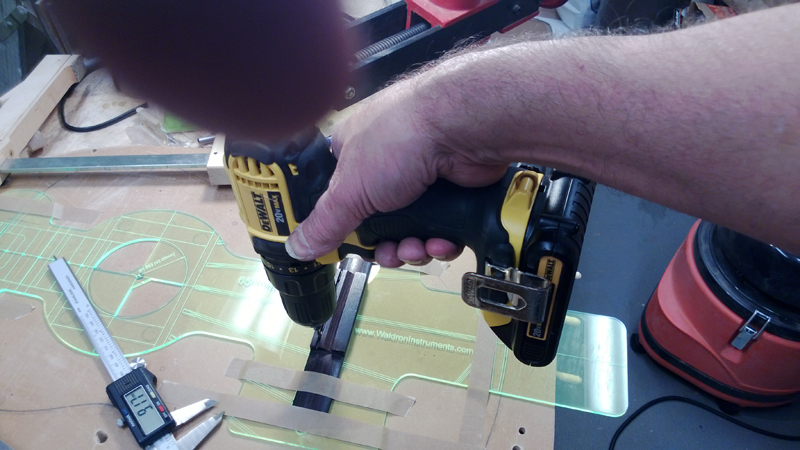
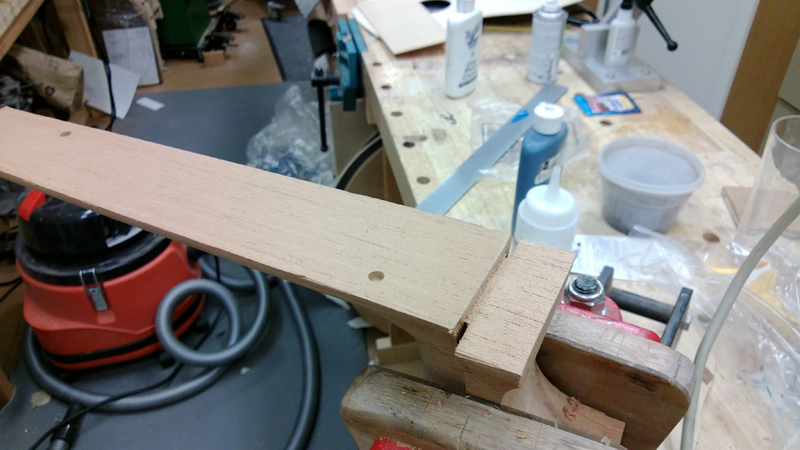
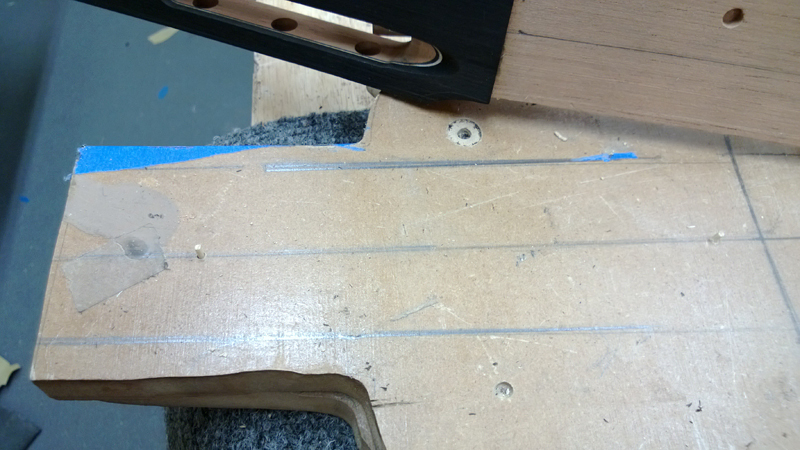
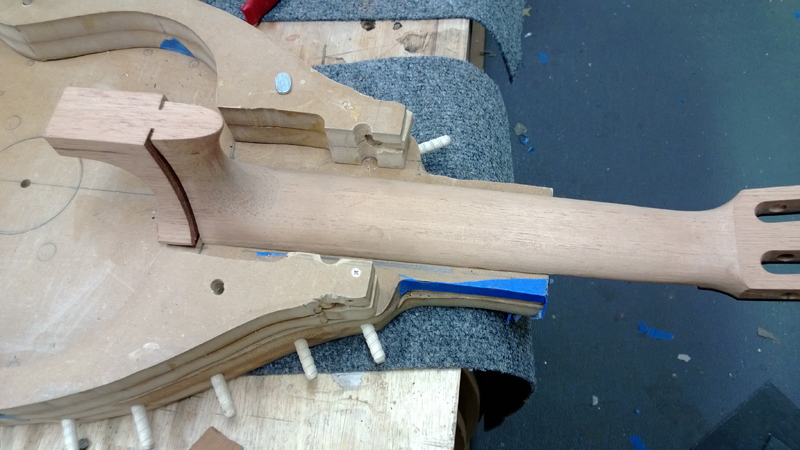
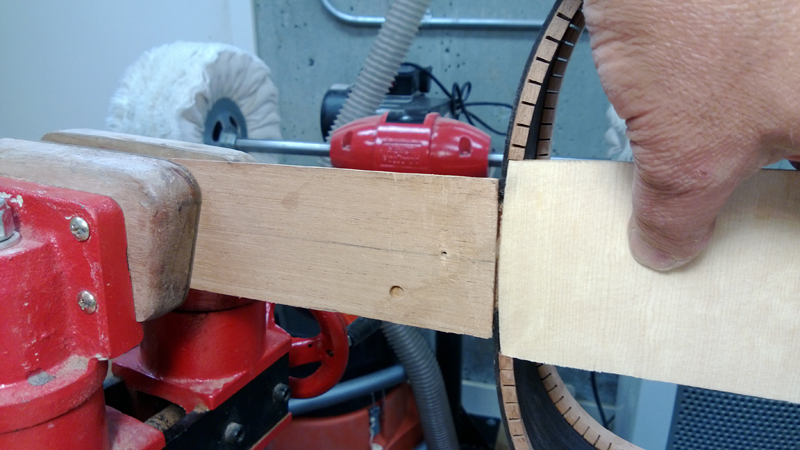
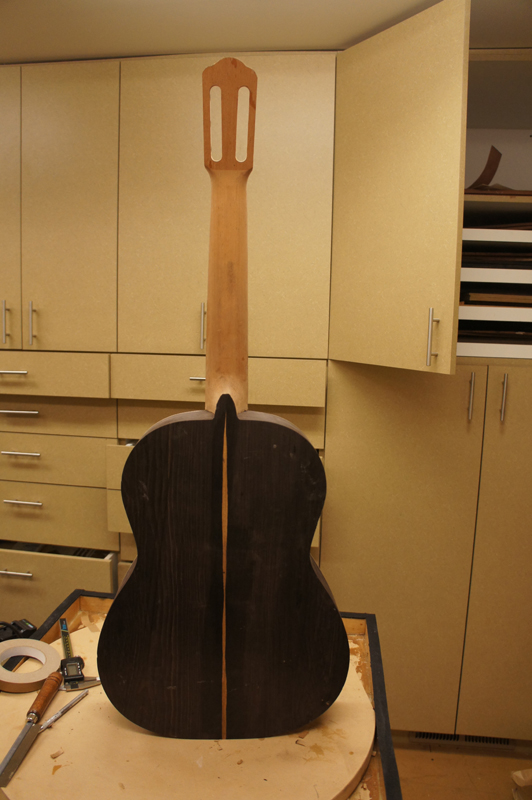
To make sure the neck ends up in the right place I index it using a template. Below you can see the previously drilled neck index holes with small bamboo pins. I used a matched template to drill the holes, indexing off the nut location and the centerline of the neck.
After that I cut the sides to the right length. The tail works just like a steel string — cut both sides square from the top side on the centerline. The heel end took more work, fitting the sides into the angled slots in the Spanish heel. The LMI neck cuts the slots at an 80-degree angle so the remaining wood is narrower at the back and wider at the top. I first cut them right on center like a steel string, then marked off the distance from center for each side on top and bottom, roughed in a cut on the bandsaw, and fitted each side perfectly using the belt sander.
I keep the neck flat to the body and plane the desired angle into the fretboard, combined with a dome. I still glue the neck dead flat — some of the better luthiers tilt the neck toward the top slightly (opposite of a steel string). I like it flat as it's easier to glue on the fretboard. To get the equivalent geometry I plane the angle into the fretboard so it's 1mm or more thicker at the nut than at the 12th fret.
✦
May 24th, 2013
Back from Turkey and Greece, ready to spend Memorial Weekend on the classical guitar. My plan: finish the rims by adding kerfed lining and start bracing the top.
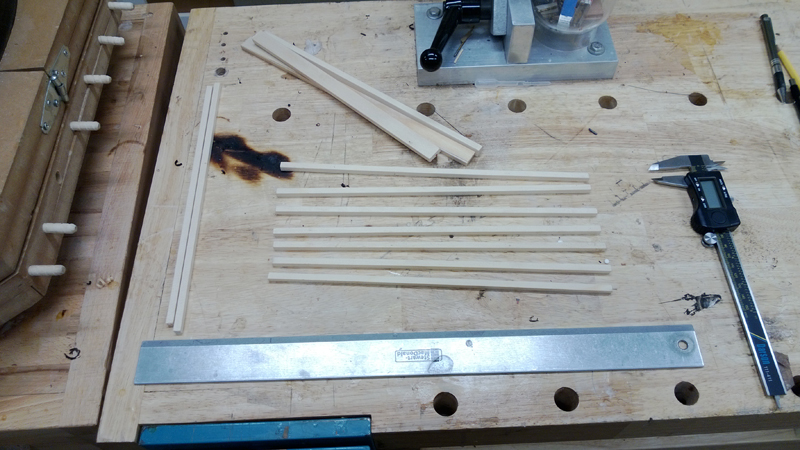
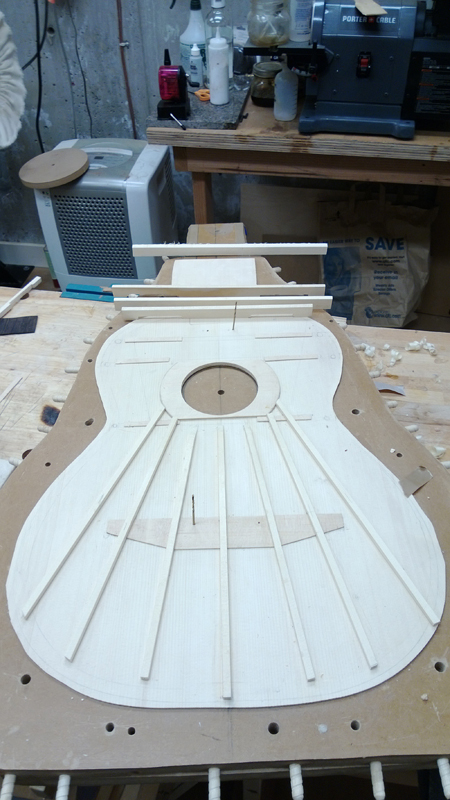
I made sure I had a complete set of rough-dimensioned braces for the top. My fan braces at this point are all exactly the same length and 6×6mm. I sorted the set by stiffness three or four times. The idea is to put the stiffest brace in the center, then the next two stiffest on either side of the center, working outward until the least stiff fan braces are on the outside. This provides some symmetry and the most stiffness where the top needs the most support, and is complementary to the edge thinning that classical guitar makers often do.
Fan Brace Height GraduationI will further enhance this by carving the fan braces to graduated heights: center brace at 6mm, the two on either side at 5mm, then 4mm, and the outside braces at 3mm. Not in the pictures: there will be two 3mm fan-sized braces in the upper bout to help against cracks — Jeffrey Elliott felt his guitars sounded better with them.
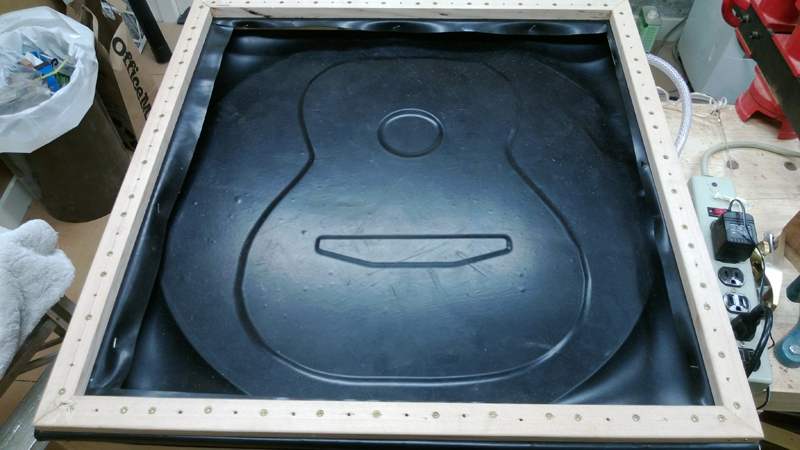
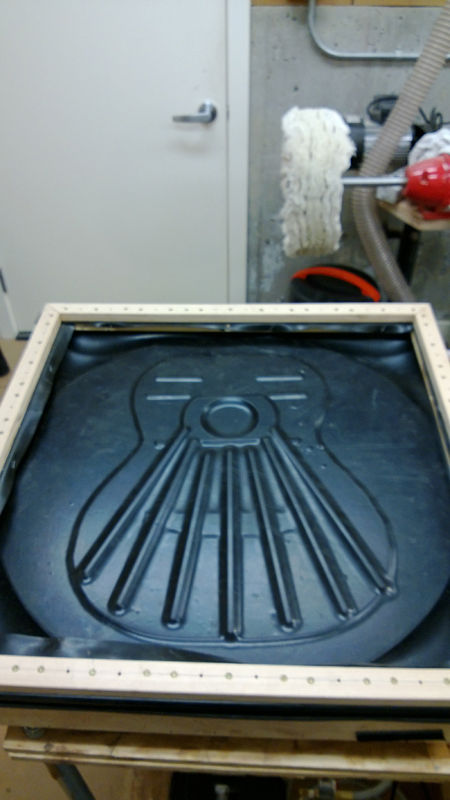
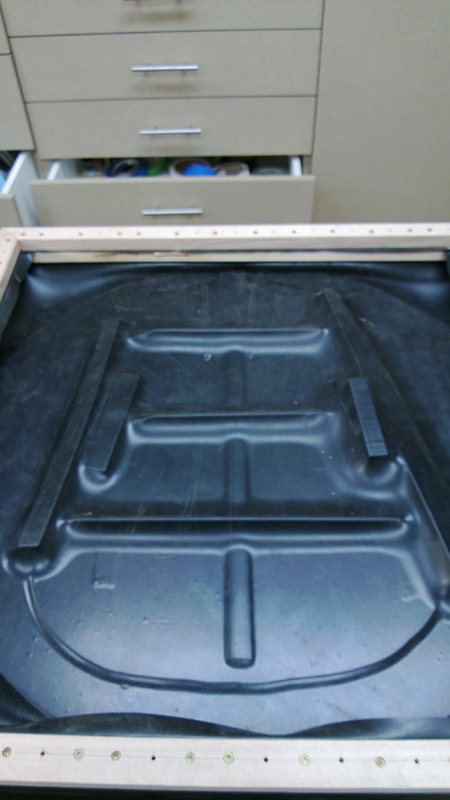
Before fitting the fan braces I needed to glue on the bridge plate, giving me an opportunity to try out my new vacuum box for the first time.
The new vacuum box getting its first workout — gluing the bridge plate
✦
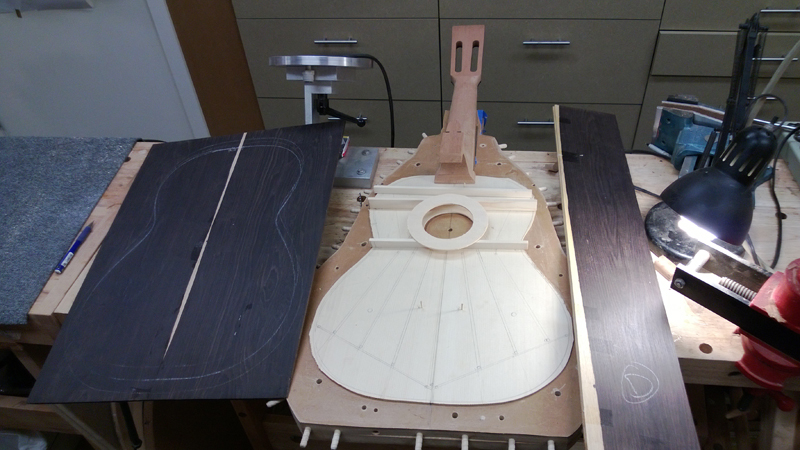
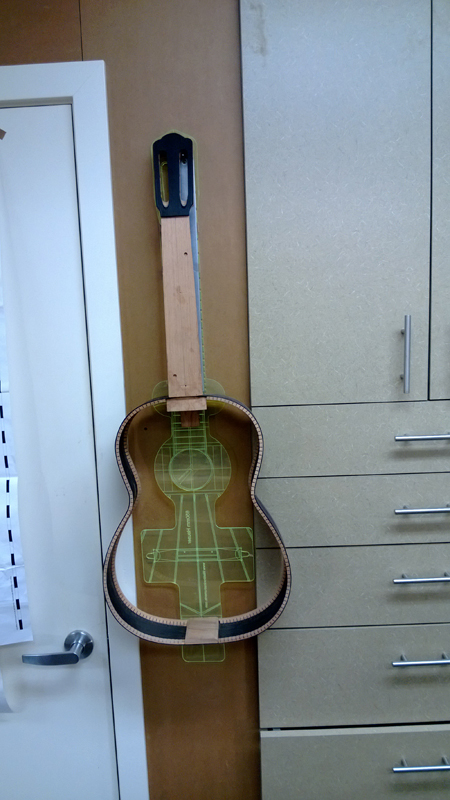
May 25th, 2013 — Neck/Body Geometry
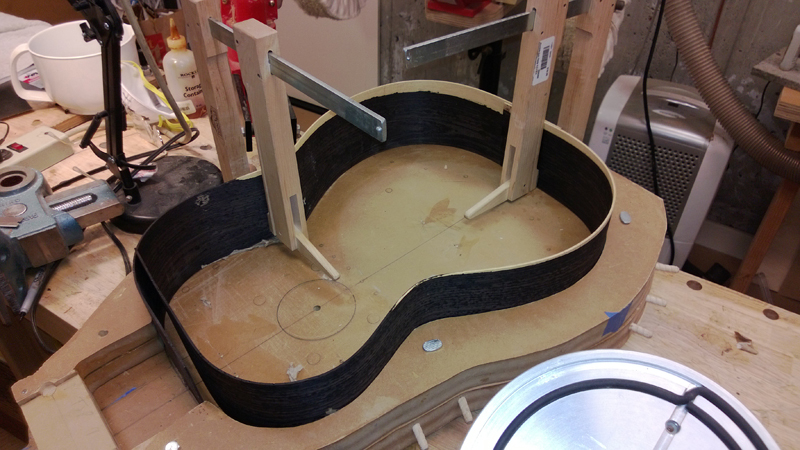
Neck and rims complete with kerfed linings — ready for assembly
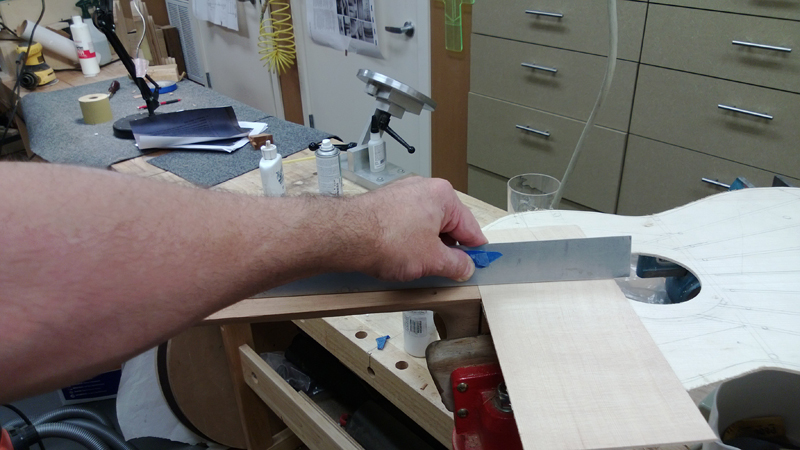
A classical guitar has a different neck/body geometry than a steel string for two reasons: it typically has the strings lower at the saddle position (10mm vs. 14mm), and especially on the bass side, the classical has higher nominal action. For a quick calculation: with a 6mm fretboard, 3mm desired action at the 12th fret, you need 2× action at the saddle (6mm) plus the 6mm fretboard plus a 1mm fret — that's already 13mm against a 10mm target, with no neck angle at all.
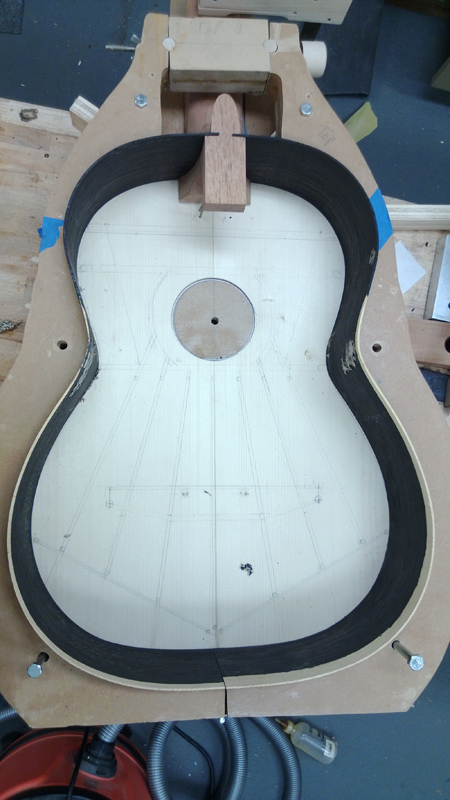
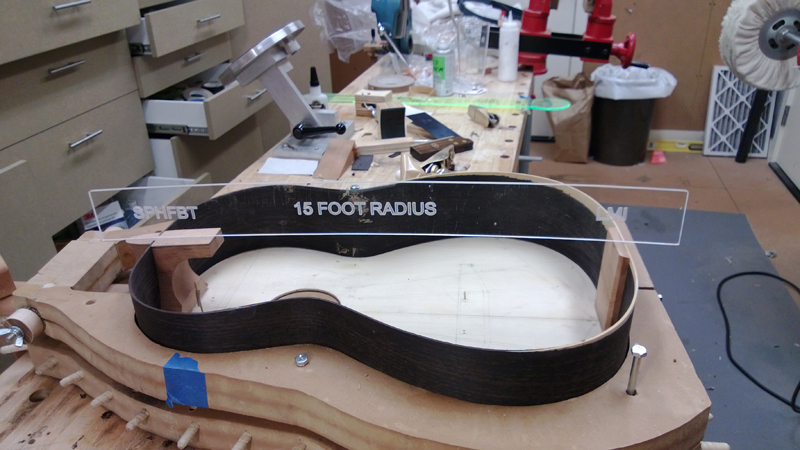
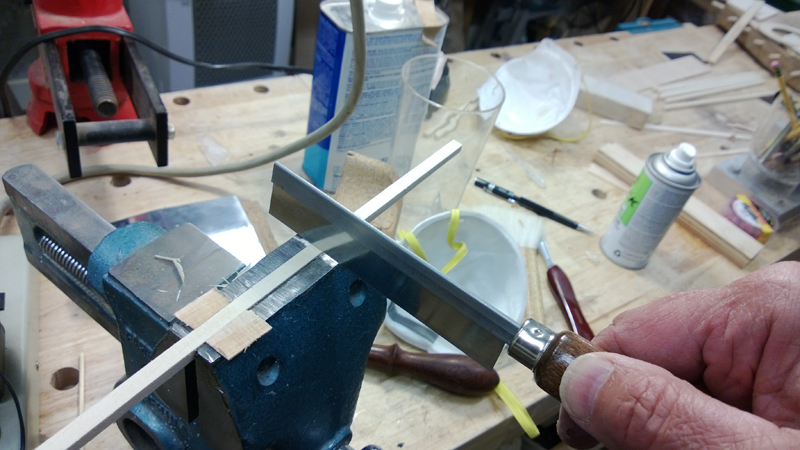
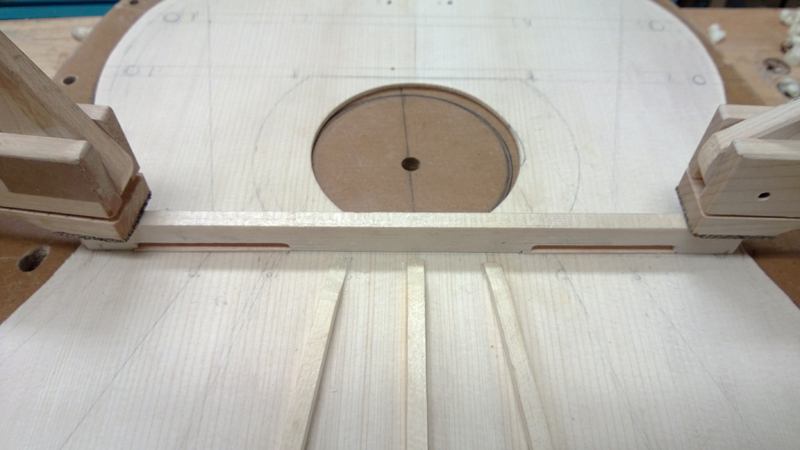
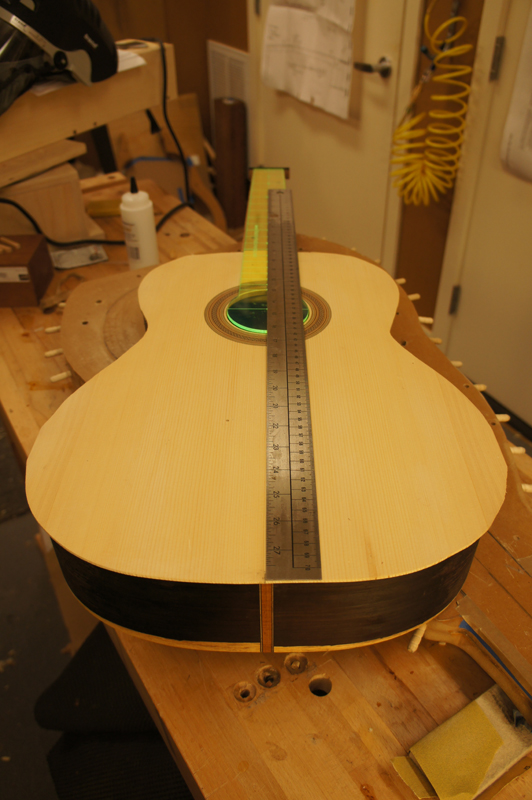
Classical builders use a variety of methods: tilting the neck toward the top so the nut end is a couple of mm higher than the plane of the body, or planing the angle into the fretboard — often combined with a dome only on the lower bout. Looking at the straightedge in the picture of my solera, you can see it sitting in the dome with a flat neck angle.
The solera — dome on the lower bout, flat neck angle. The straightedge shows the geometry clearly.
The neck angle in a classical with a Spanish heel is not fixed until the back is glued on. When closing the box, I make sure the top is properly indexed in the solera, glue the neck and rims to the top first, and then clamp on the back. The solera keeps everything properly aligned throughout the whole process.
Mistake & RecoveryI thought I had everything properly profiled when I noticed a two-inch portion of the top rim had a slight gap. No problem — I carefully used a flat board to sand the rims down perfectly flat. Well, since I had already glued the rims into the neck slots, that left the top sitting too low relative to the neck. Fortunately I had only tacked them with super glue. I flooded the joints with super solvent and was able to remove the rims and properly reset them.
✦
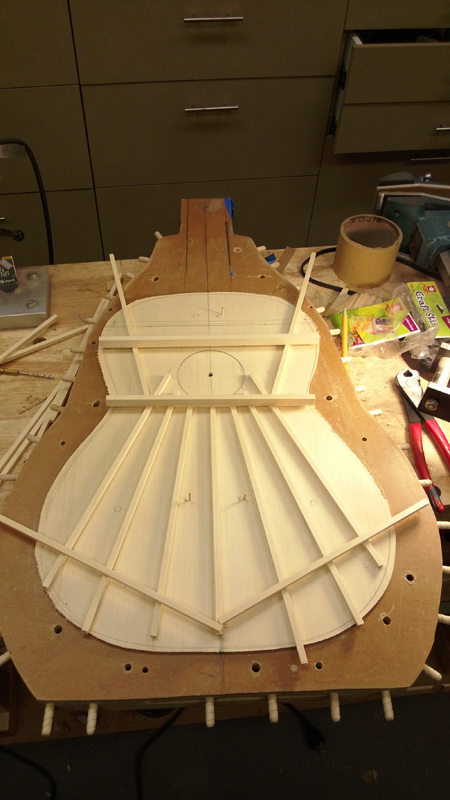
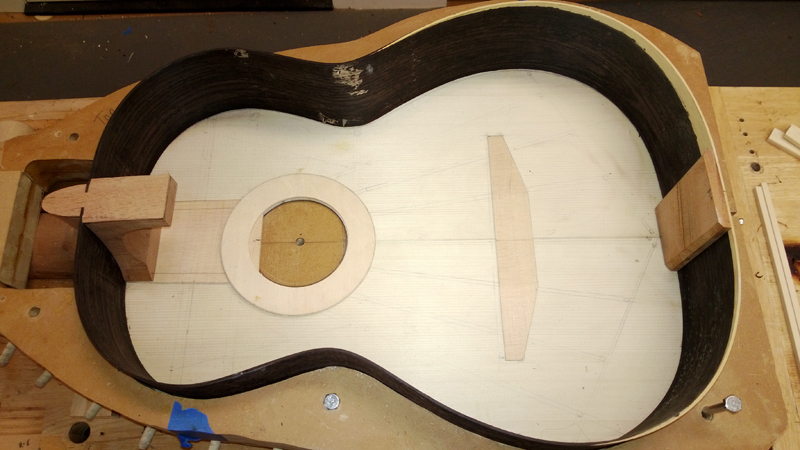
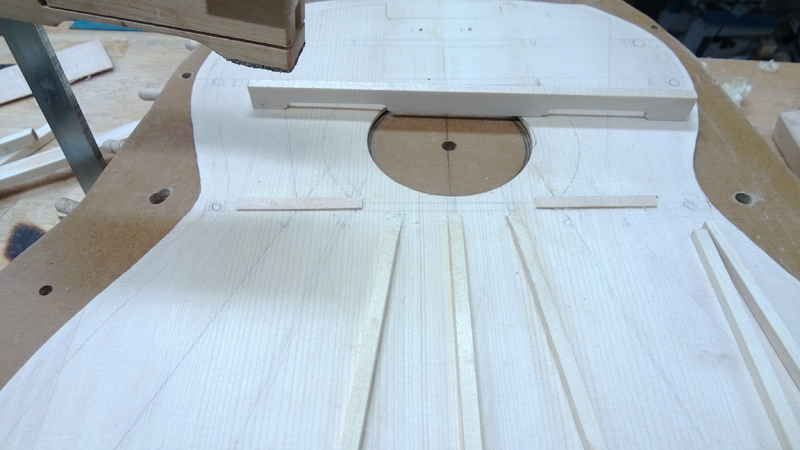
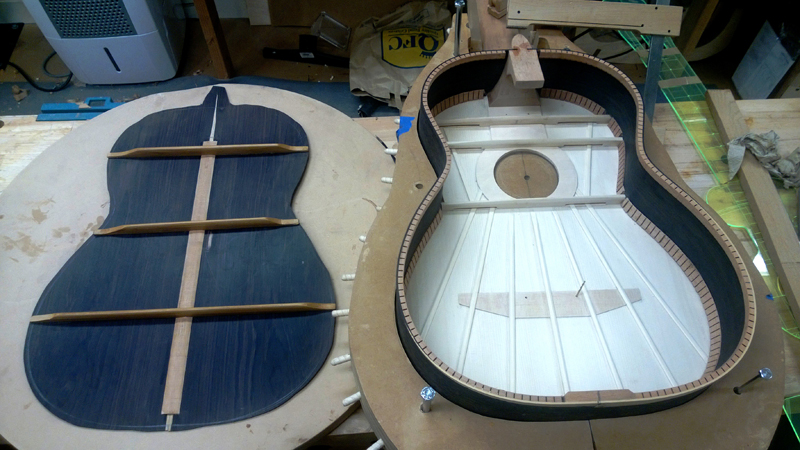
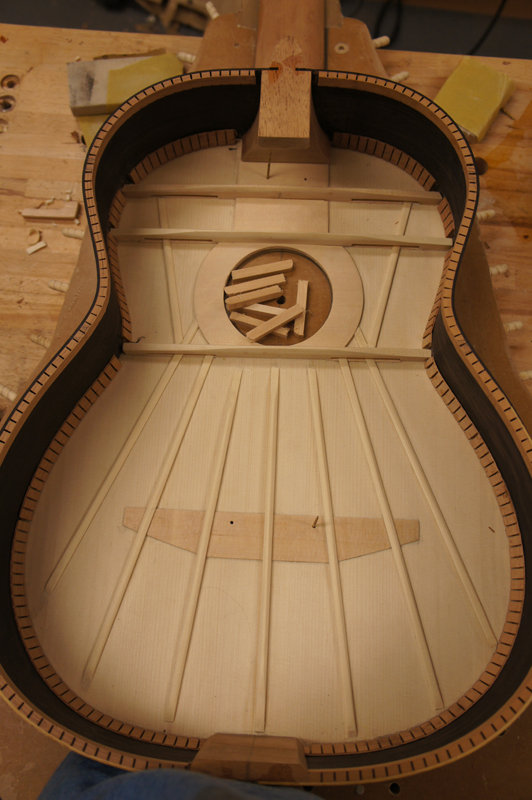
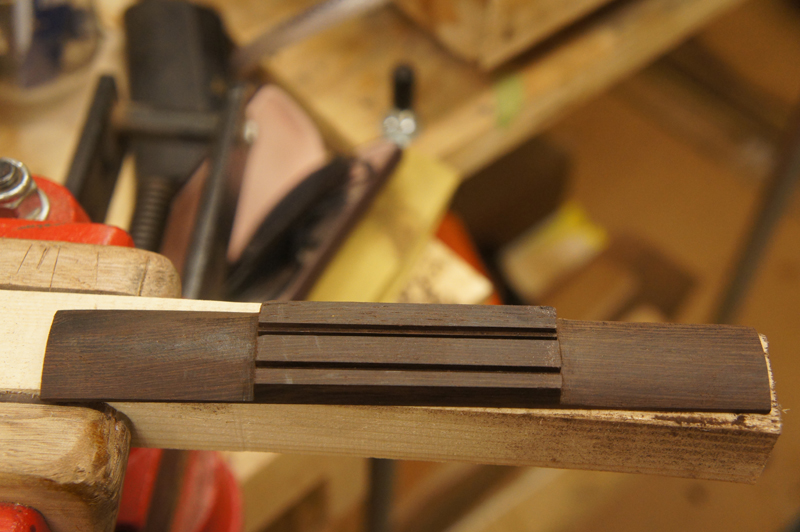
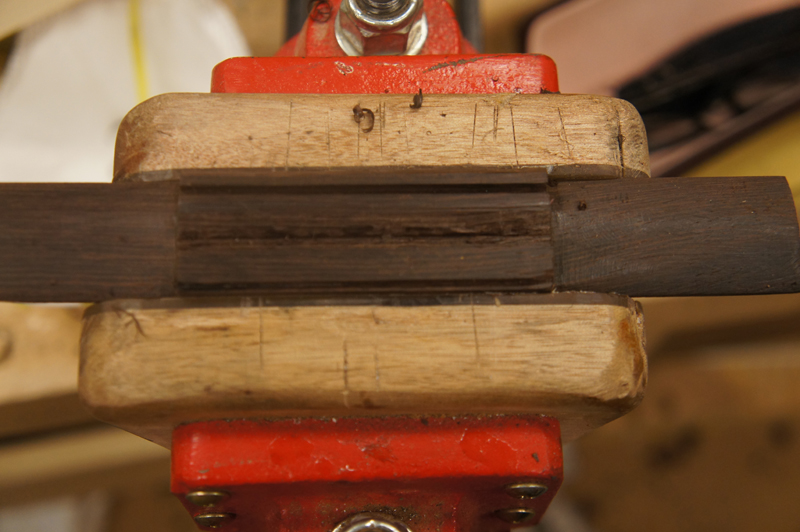
May 26th, 2013 — Open Harmonic Bar Fan Bracing
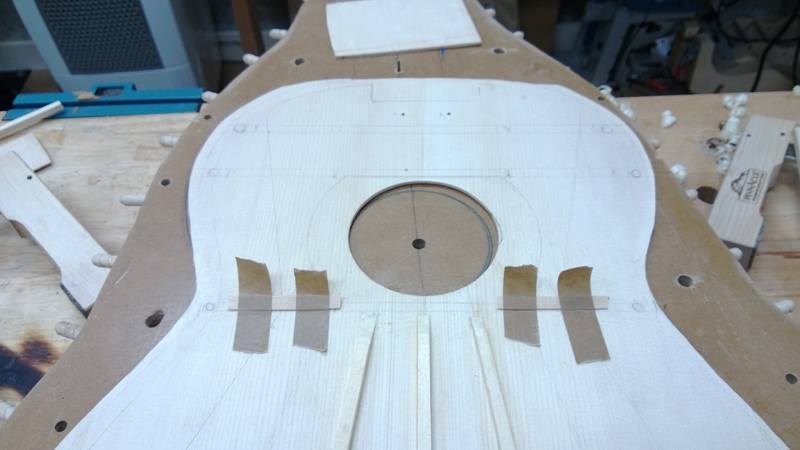
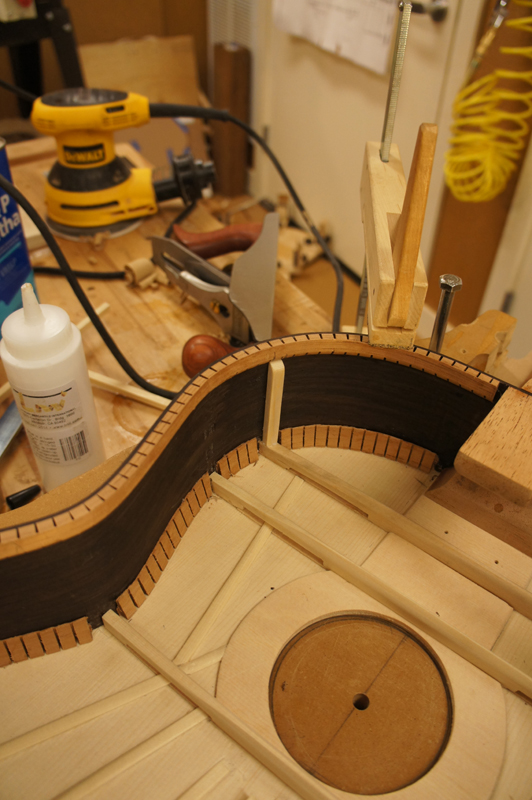
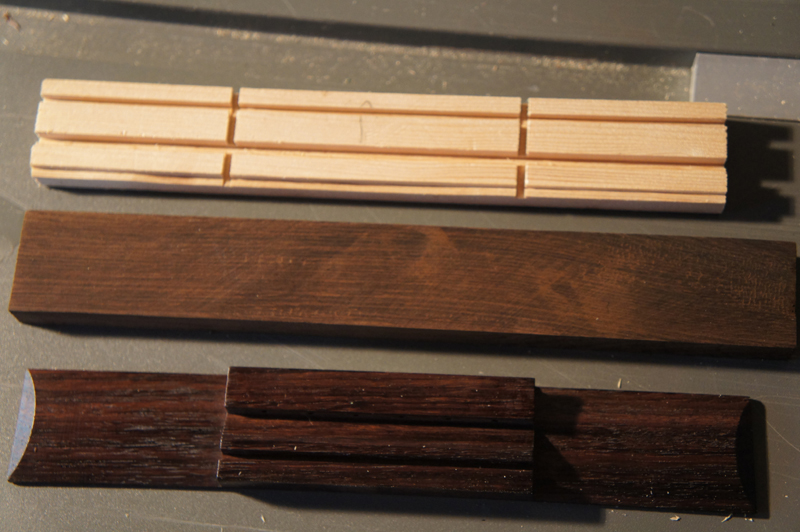
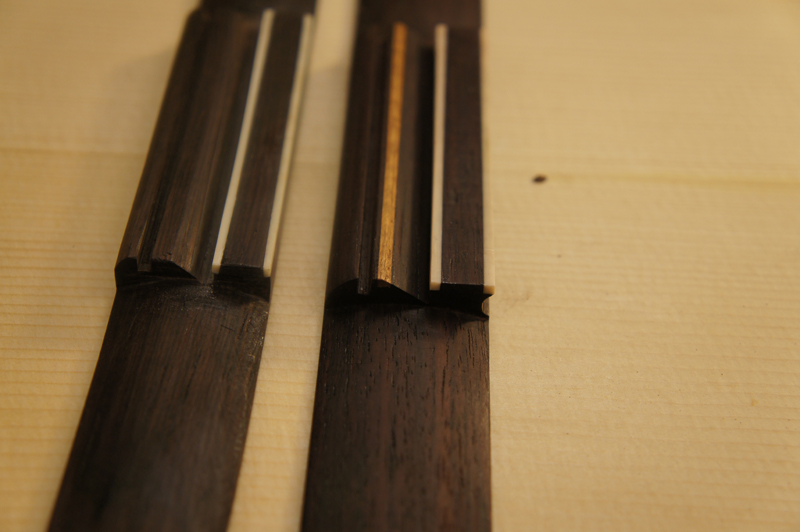
The bracing pattern I'm using is a modified Hauser 1943 plan that I learned in Jeffrey Elliott's top voicing class. The interesting thing about this pattern is that it uses open transverse braces to open up the top. To avoid cracking I'm gluing 1mm thick straps of wood to bridge the openings in the transverse braces.
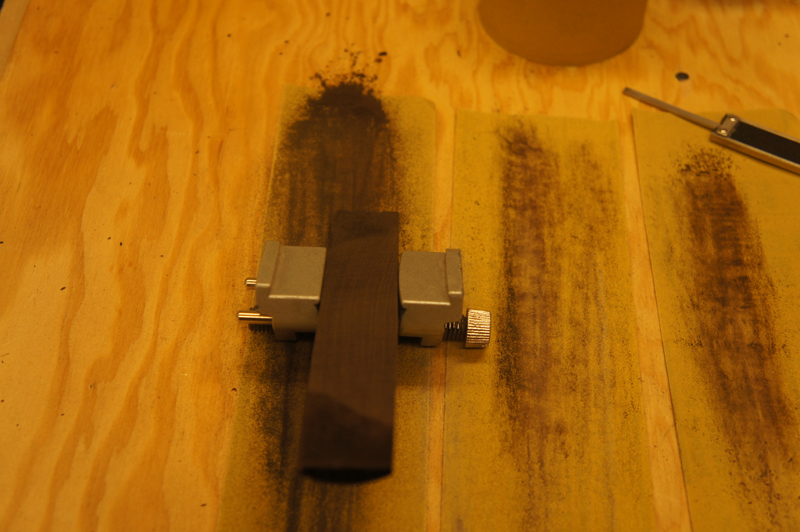
I used a plane to put close to a 25' radius on all of the lower fan braces. I used to use a dish but it is so easy to sand an angle on the bottom that I now use a plane and check the fit with the dish. I glued some cutoff from the soundboard patch to my vise and used it to gauge the correct depth to provide relief for the soundboard patch and, on the outer braces, the strap underneath the transverse brace opening.
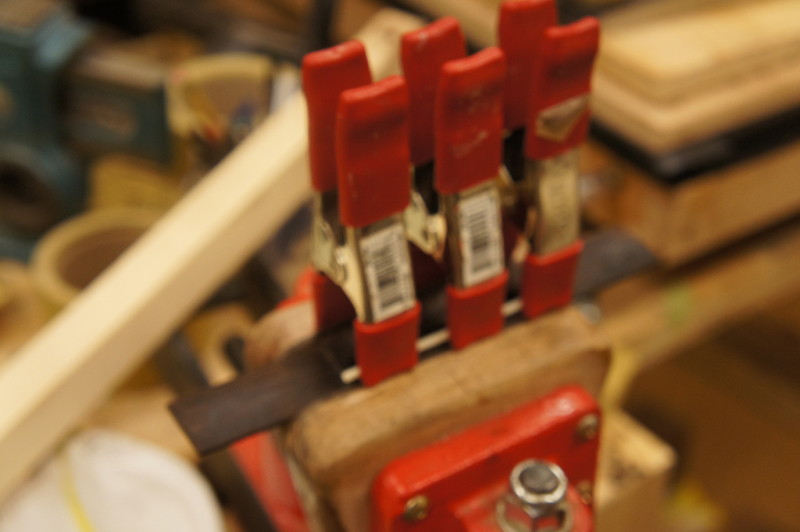
For each open transverse brace I used the brace with cut straps to fix the location of the strap. I clamped the brace in the proper location, set the location for the strap, and carefully taped it down. The tape acted as a hinge — I could fold back the strap, put glue on it, and move it back into the correct location.
✦
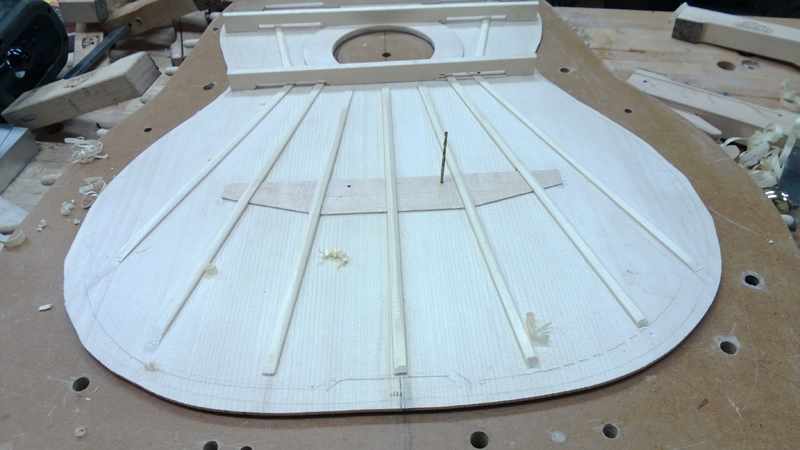
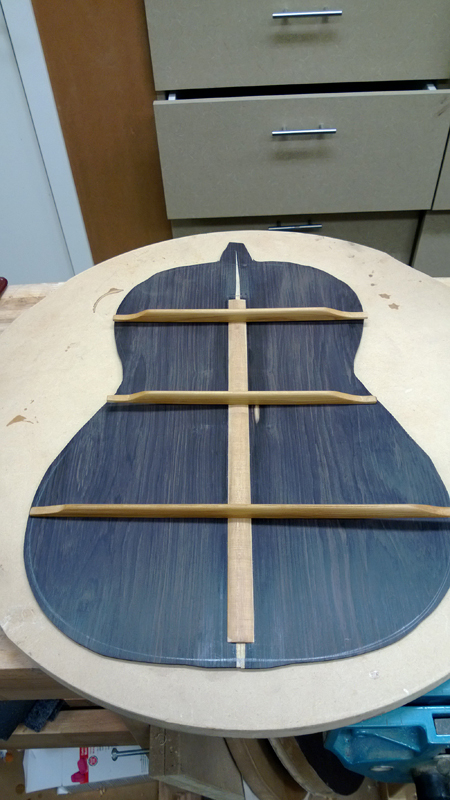
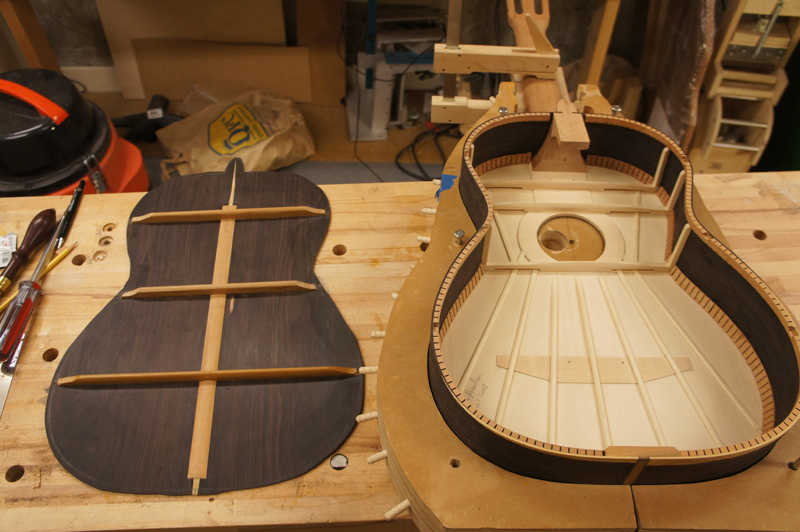
May 26–27th, 2013 — Back Bracing
I finished bracing the top and started on the back. I pre-carved the back braces and put a few coats of shellac on them — the idea is to have sealed braces and center strip on an otherwise unsealed back interior. No acoustic reason, I just hope it looks cool.
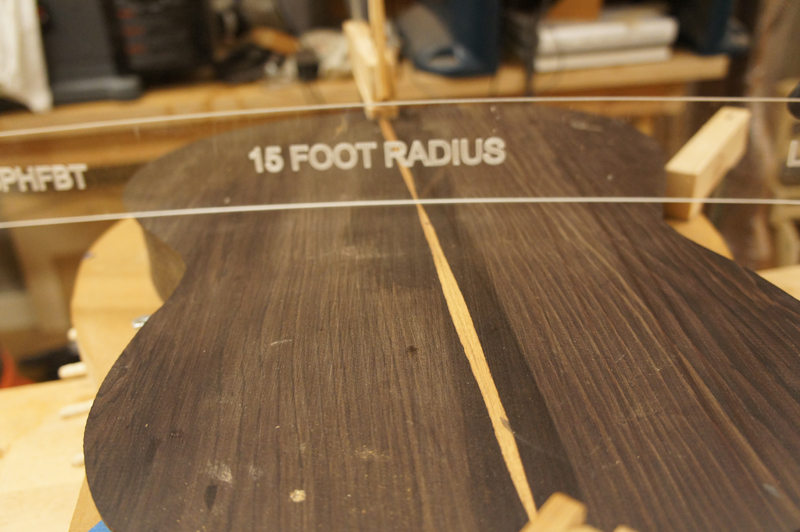
When gluing the braces down in a 15' radius dish I wasn't happy with how the end of one brace was seating, so I put a few bits of brace wood on the ends to hold them down with the vacuum. Ultimately there was no problem with how the braces glued down.
✦
June 1st, 2013 — End Strip & Solera Setup
Had to hit the honey-do list today so I was only able to get the end strip in and cut a bunch of small braces to hold the transverse braces down.
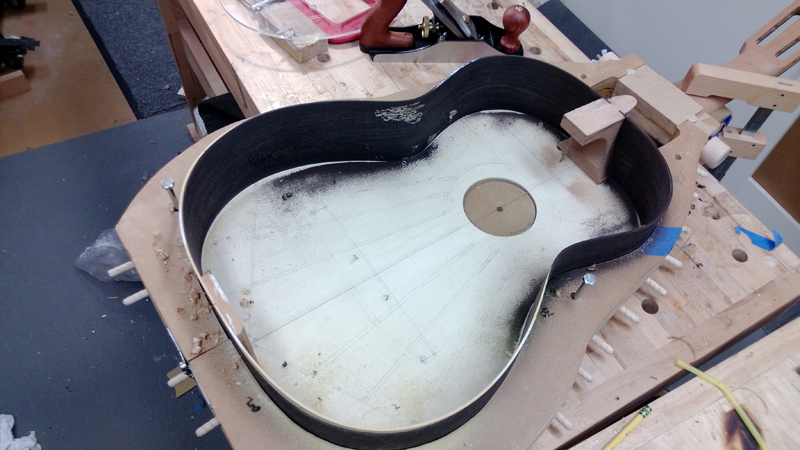
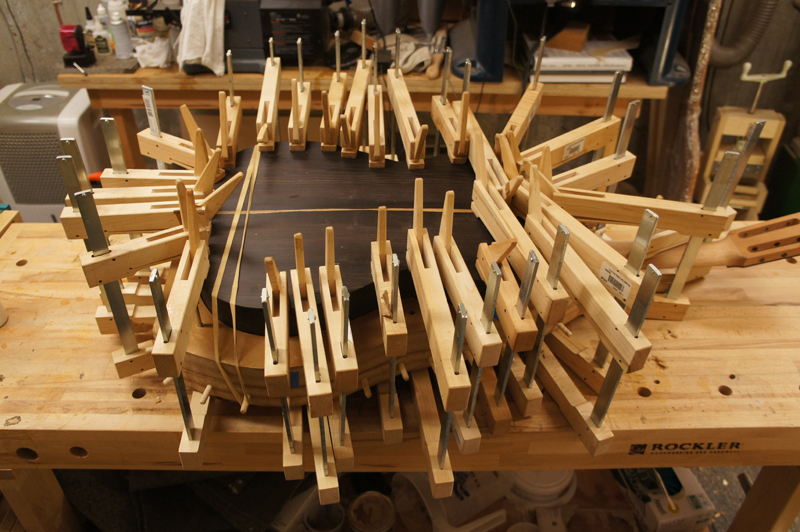
When I glue the top down it happens as shown in the pictures — top and sides in the solera, mostly using cam clamps but rubber bands as well (that's what all the dowels on the solera are for). I can make sure the rims are clamped right where I want them on the top. Not visible but in place: the neck is indexed to the solera with 1/8" diameter dowels. So if my indexing is correct I cannot fail at having the top and neck properly aligned.
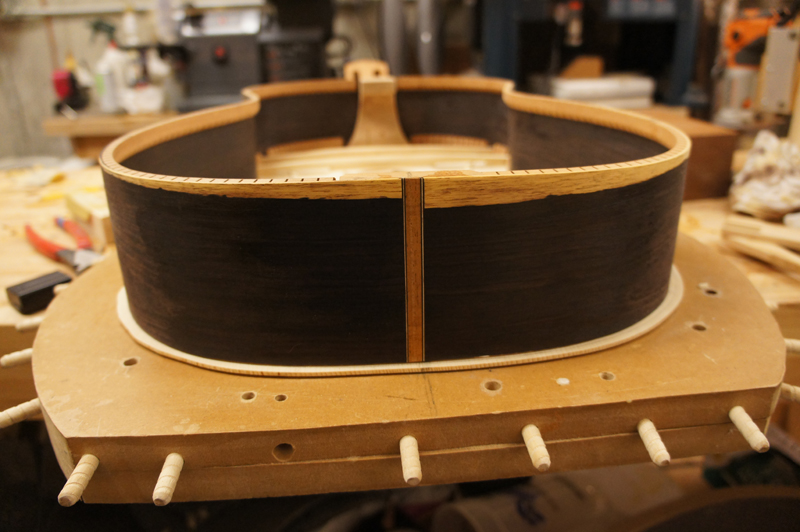
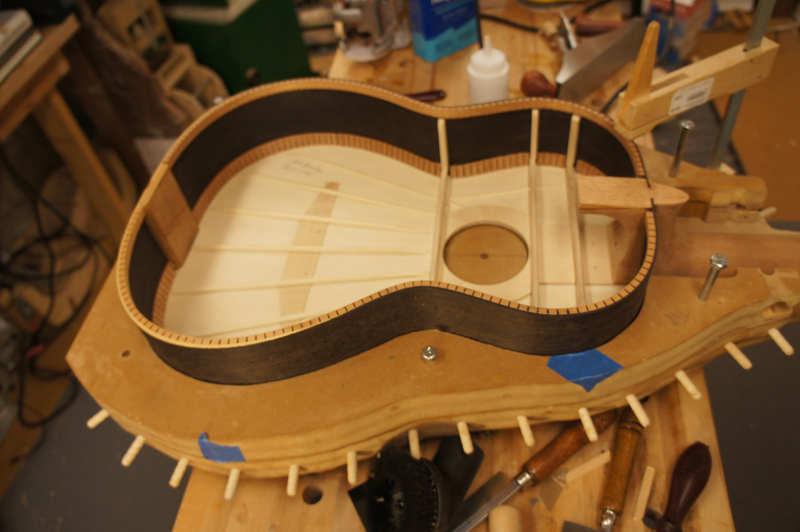
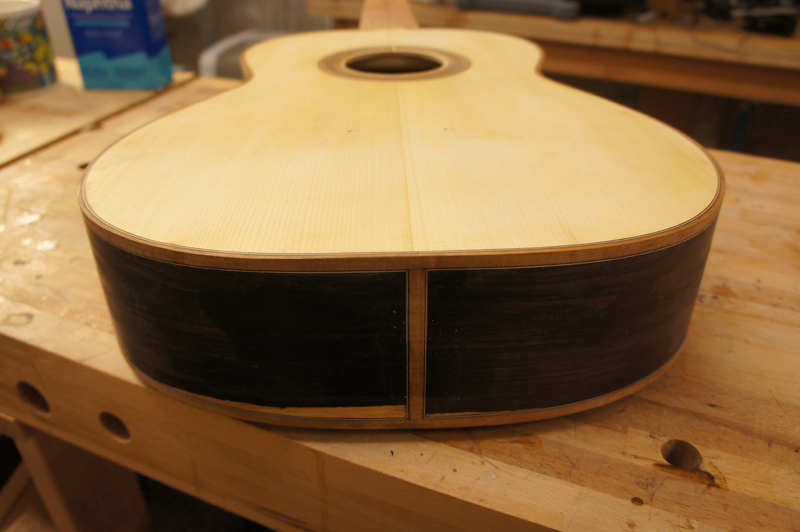
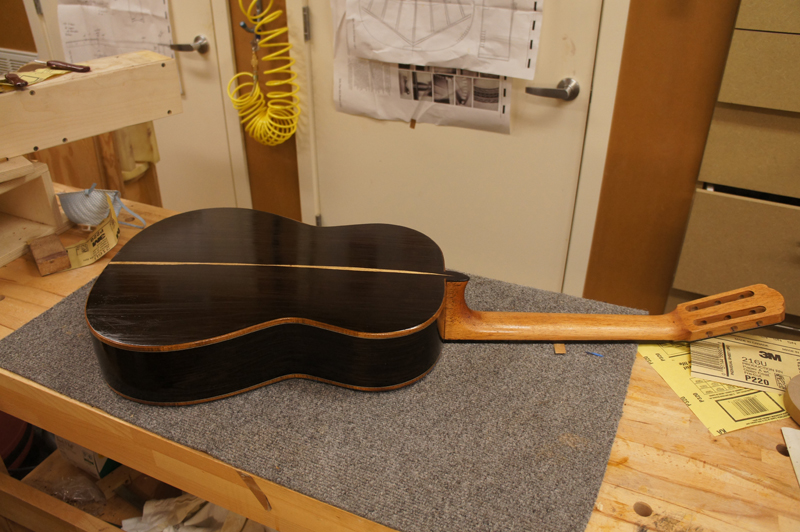
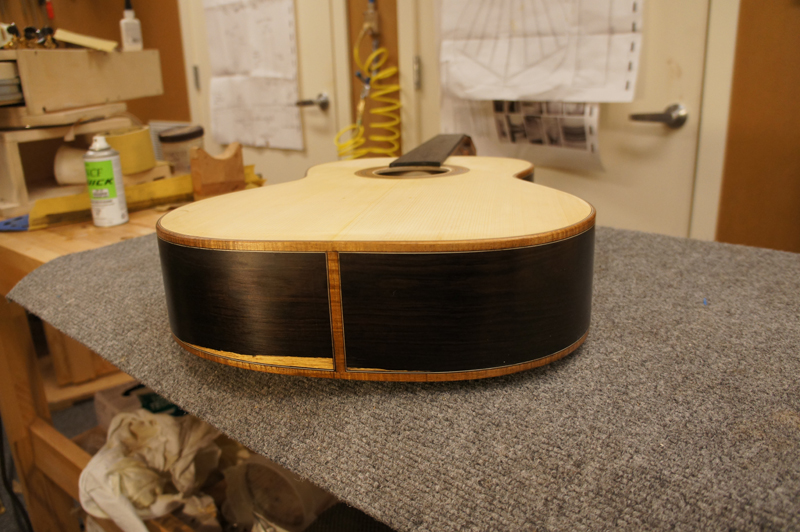
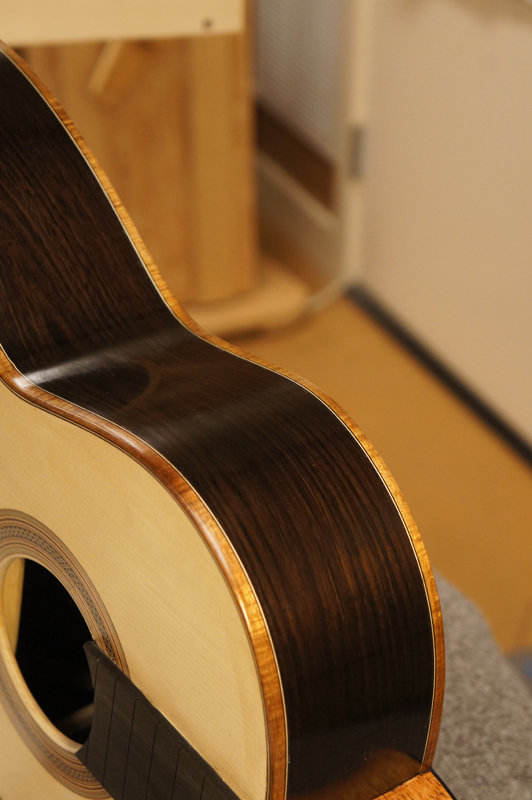
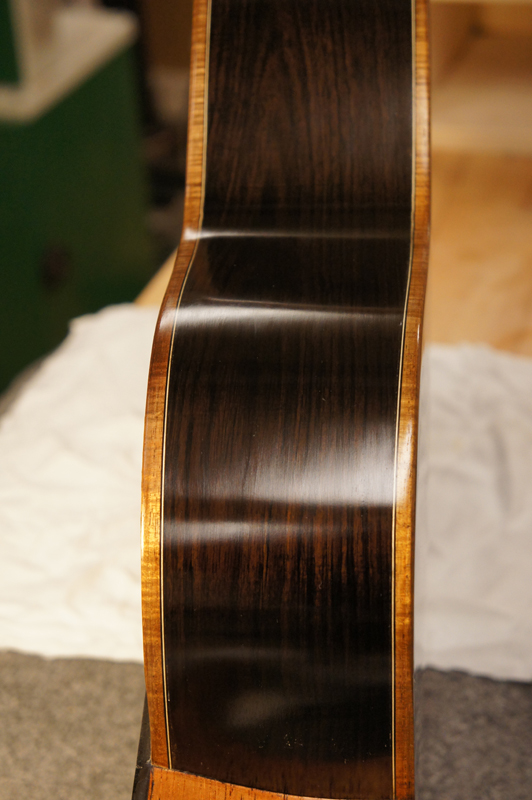
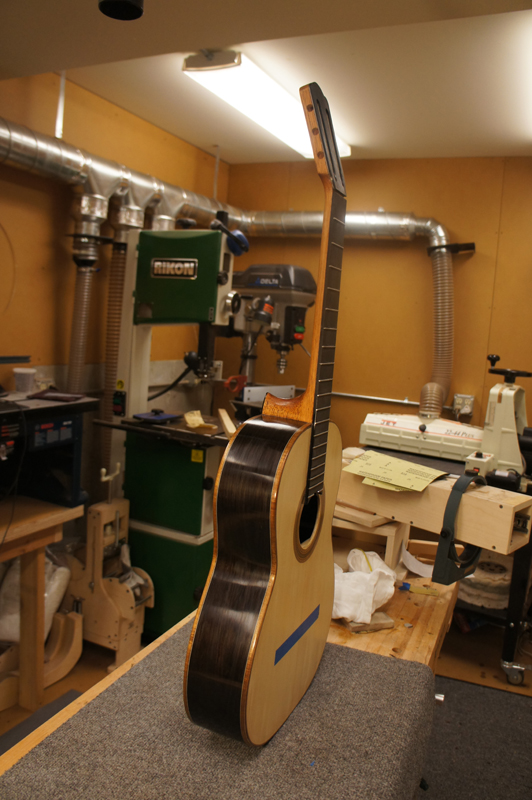
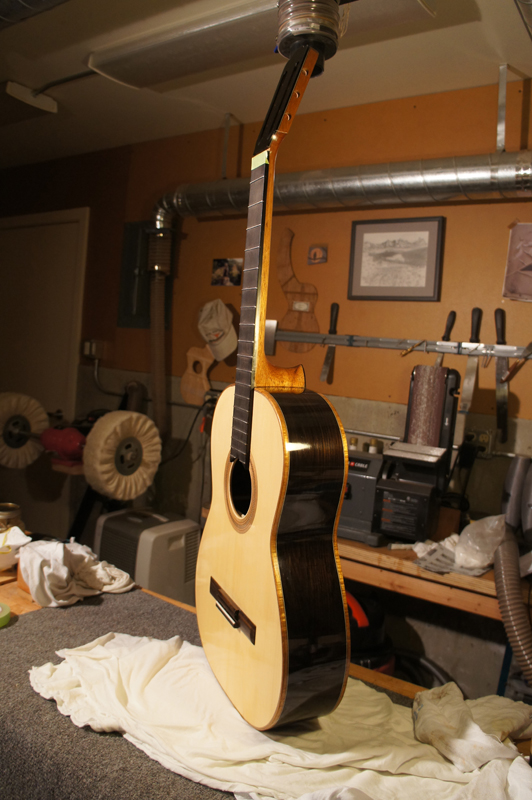
These pictures are also the first view of my Tasmanian Blackwood bindings combined with my African Blackwood (Dalbergia melanoxylon) back and sides.
Tasmanian Blackwood bindings against African Blackwood
✦
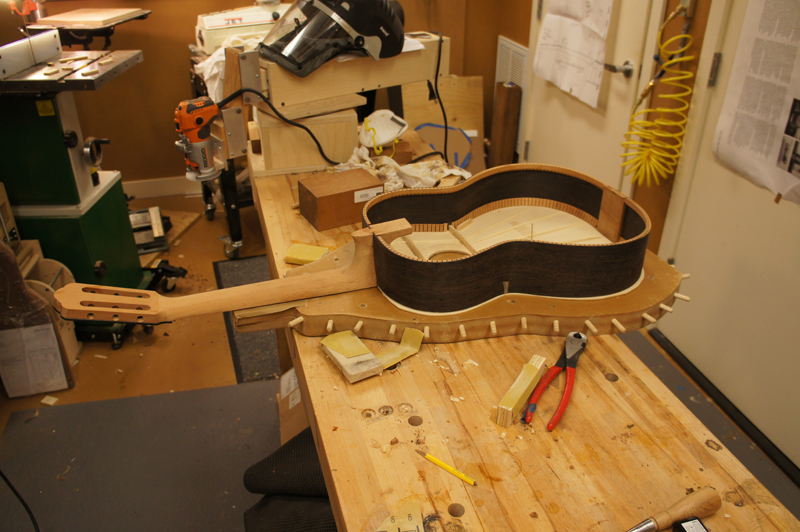
June 2nd, 2013 — Top Glued On
I got the top glued onto the rims today with the neck straight and centered. I also nearly finished preparations for gluing on the back — after gluing on the top I glued small braces to hold the harmonic braces in place and finished marking where I need to route for the back braces. I had to cook dinner and had a couple of drinks, so I'll save the routing for tomorrow.
Top on, neck centered — ready for back braces to be routed tomorrow
✦
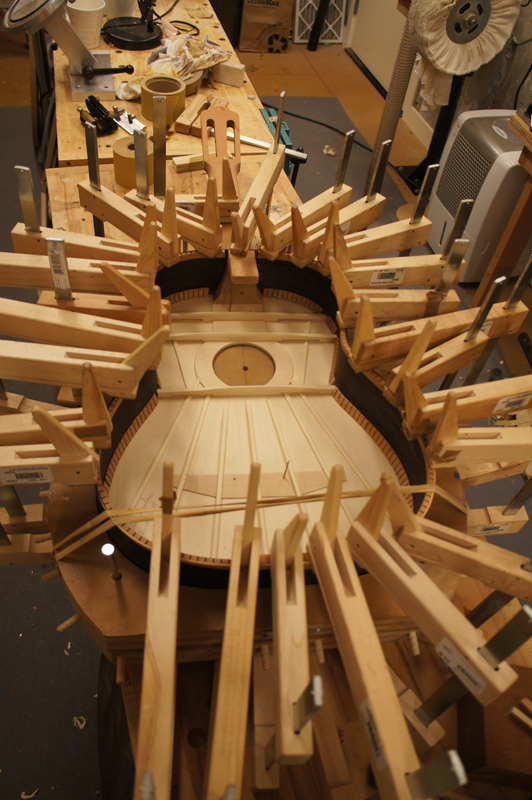
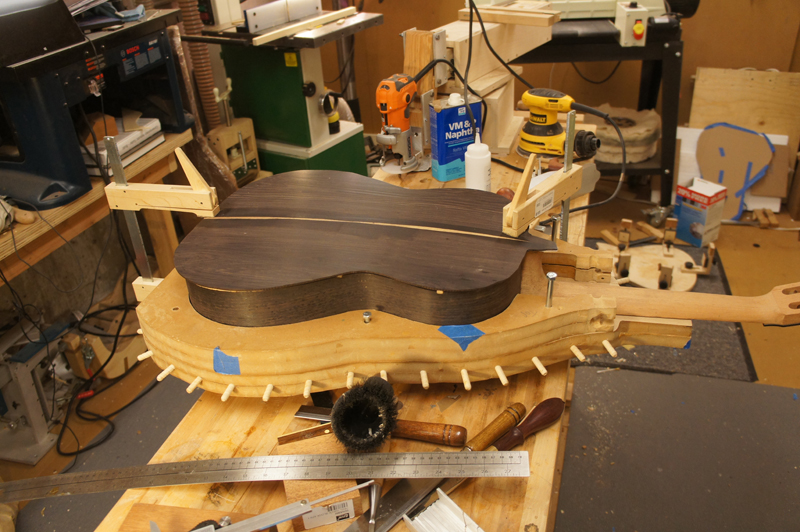
June 4–5th, 2013 — Closing the Box
I finished closing the box on the classical guitar today. I routed out the rebates for the back braces and cleaned things up. One last-minute change: I reworked my solera so that the neck has a slight forward tilt — the nut location should be about 2mm higher than the plane of the guitar. I had been planning to rework the fretboard instead to get the geometry right, but most of the higher-end classical luthiers do it this way, so I decided to follow suit.
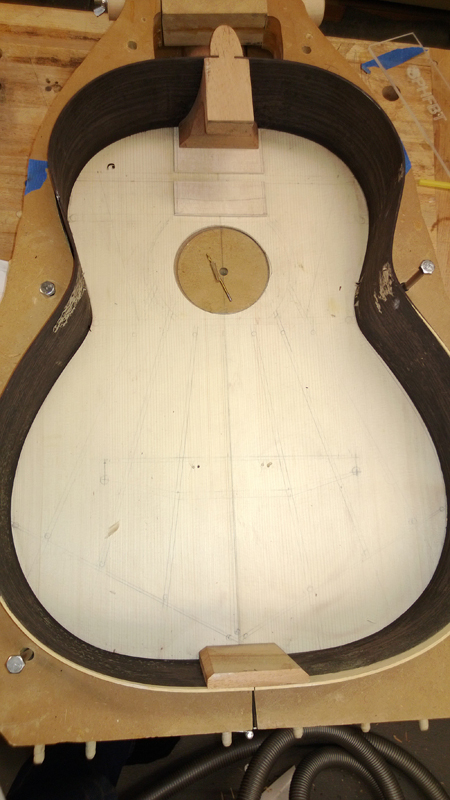
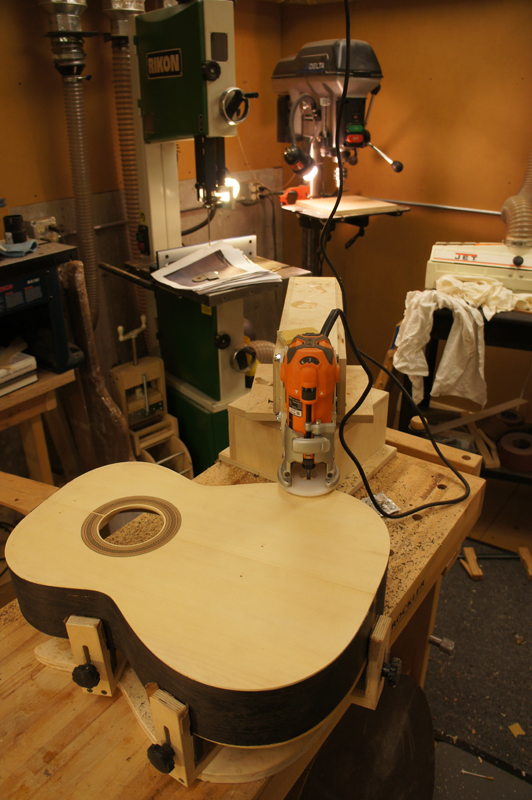
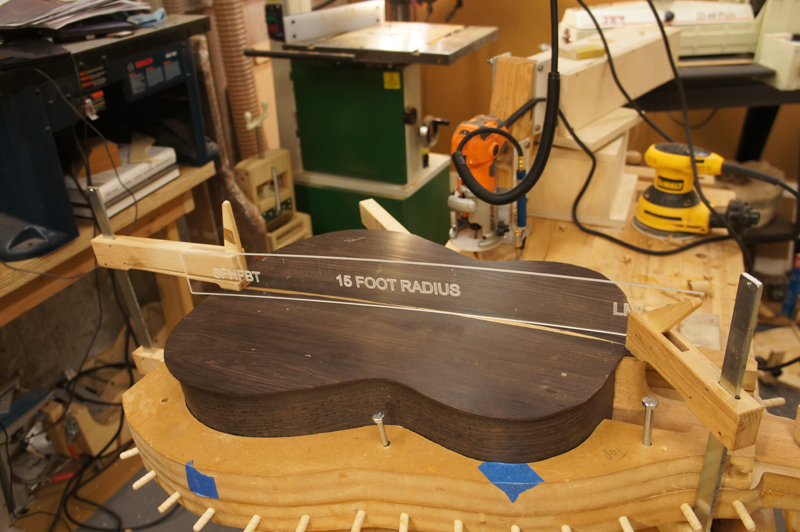
The pictures show my setup for routing the rebates — I mostly carve the ends very close to 1/8" but setting the depth of the bit on my die grinder right on the brace allows really tight joints. The back matched the profile beautifully, conforming nicely to the 15' radius with just the heel and end block clamped. When I went to glue the back on I got really good squeeze-out after just a few clamps were on.
Box closed — the back conformed perfectly to the 15' radius
Like Christmas morning — I could only sleep until 4:30! I pulled the clamps off and trimmed the excess everywhere except near the neck and heel. From my initial measurements everything is where I wanted it. On to binding and purflings.
Closed, trimmed, and everything exactly where it should be
✦
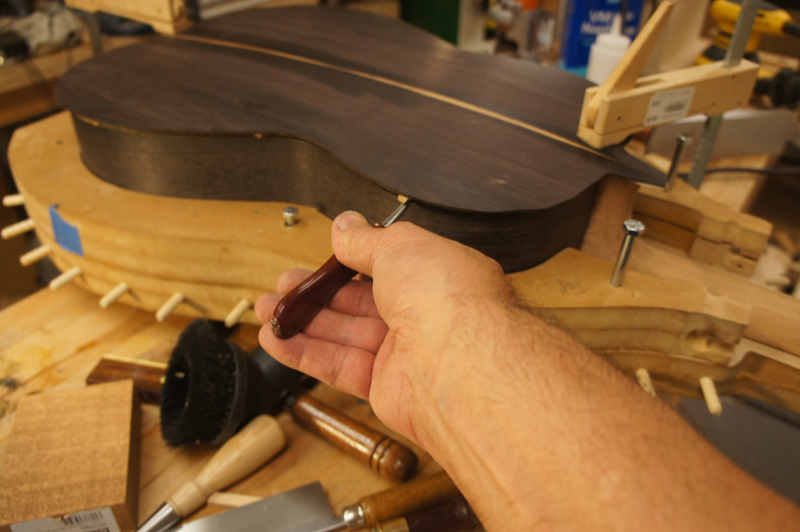
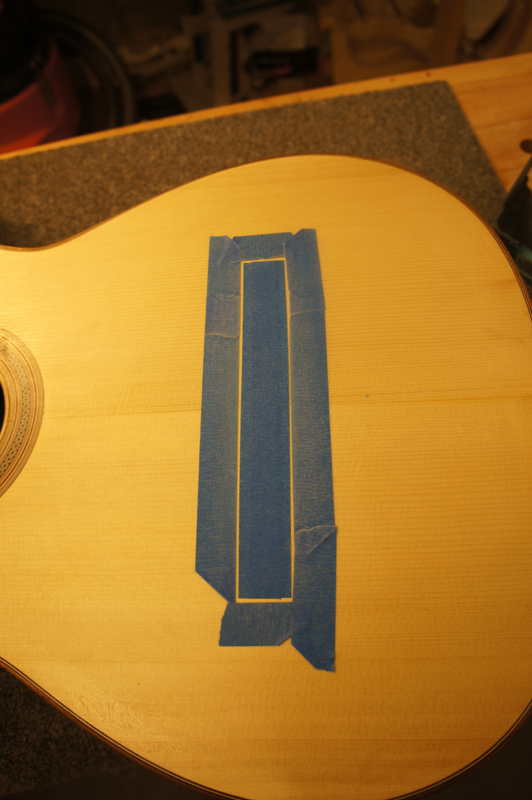
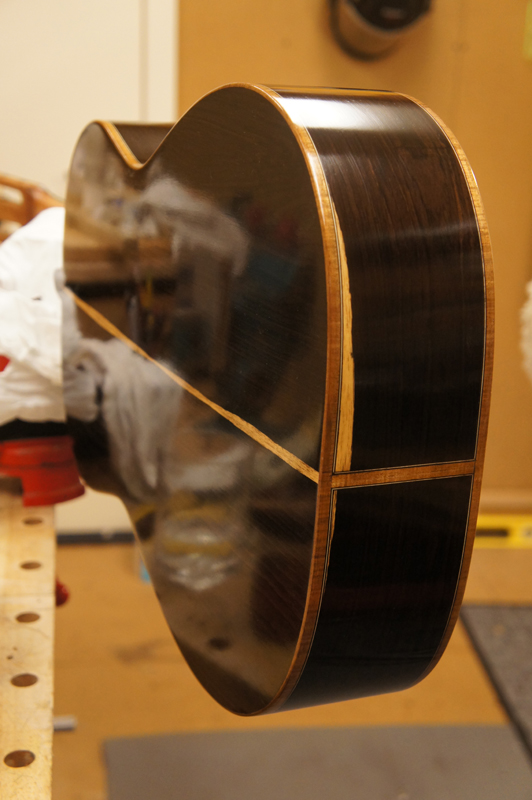
June 28th, 2013 — Binding & Purflings
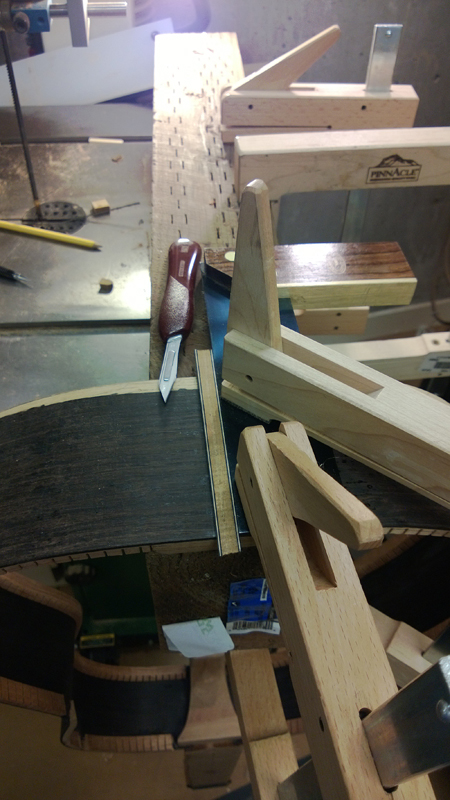
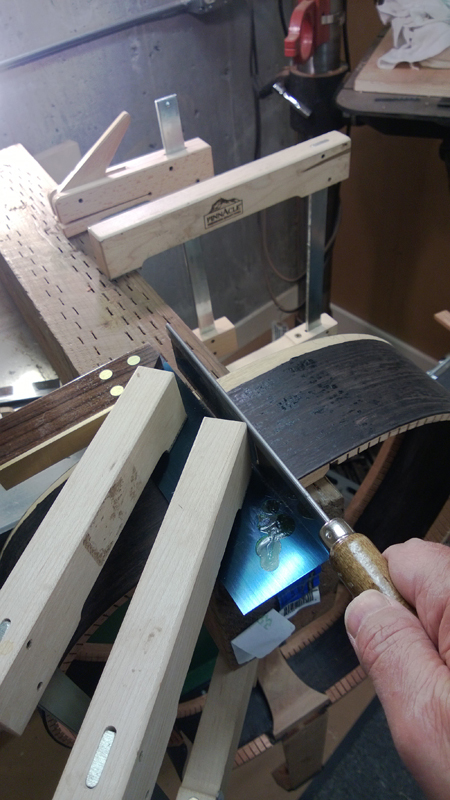
I had a hectic schedule with travel to Beijing for a talk, but in the meantime I installed the binding and purflings — not without a few issues. Live and learn.
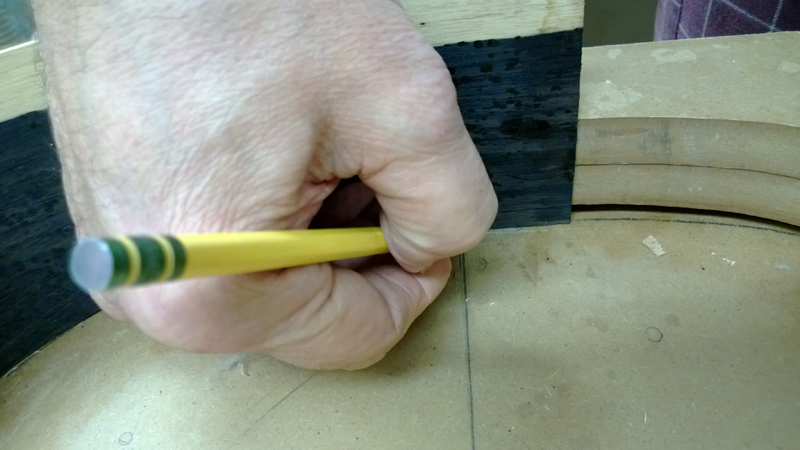
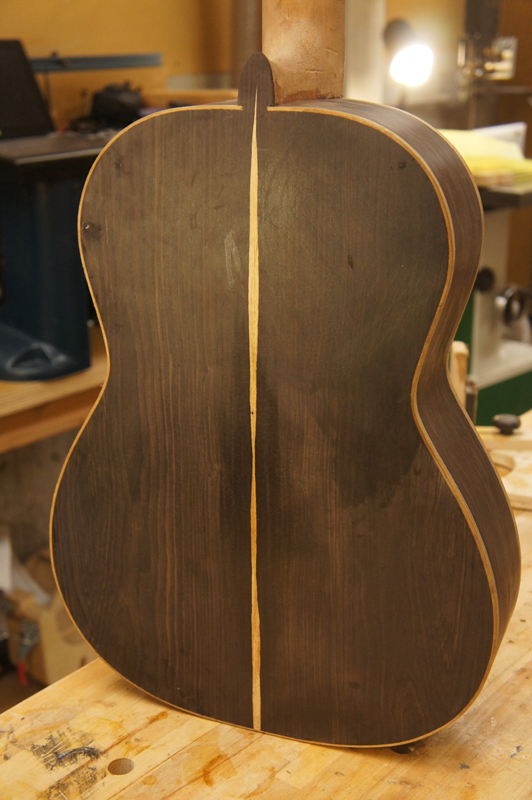
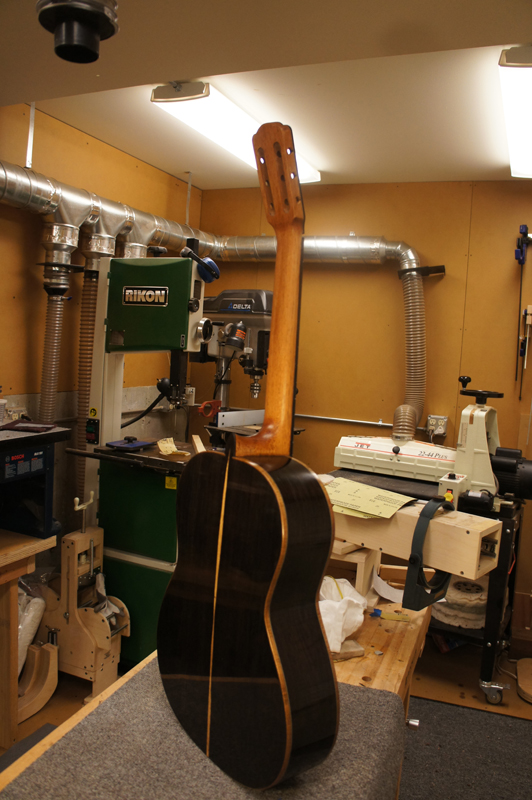
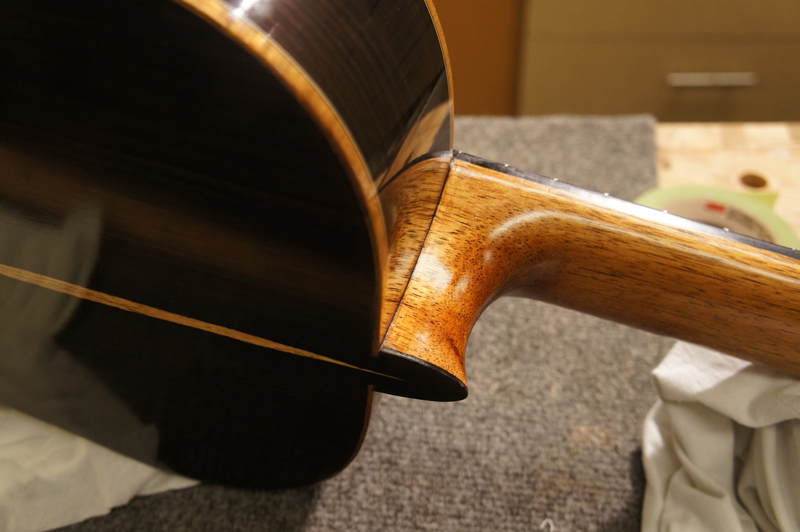
Working with a classical built on a Spanish neck requires the area around the neck to be done entirely by hand with knives and chisels. With the sapwood strip up the center of the back I didn't want to cut the binding channel where the back wood became the heel cap — instead I cut it in a bit, much like a violin back, using a scalpel to draw out the cut and a mini mill grinder for the channel start, with a 2mm chisel for the remainder.
Two Problems Worth DocumentingWhen routing the back I was a little loose where I started a cut and tore out a hunk of back almost to the end of the kerfed linings. I cleaned up the tearout and carved a matching patch from a cutoff right next to the tear-out — save those offcuts. See if you can find it in the photos. Once you see it, it doesn't disappear, but it doesn't look too bad. The second issue: I decided one lining on the back was too dark. I removed the binding, unfortunately gouging the miter on the end strip in the process. Rather than patch it I decided to remove the whole binding and start over. With a 1mm chisel (made from a 2mm chisel), after using a scalpel to separate the binding from the rims, I chiseled it out cleanly and installed a new one.
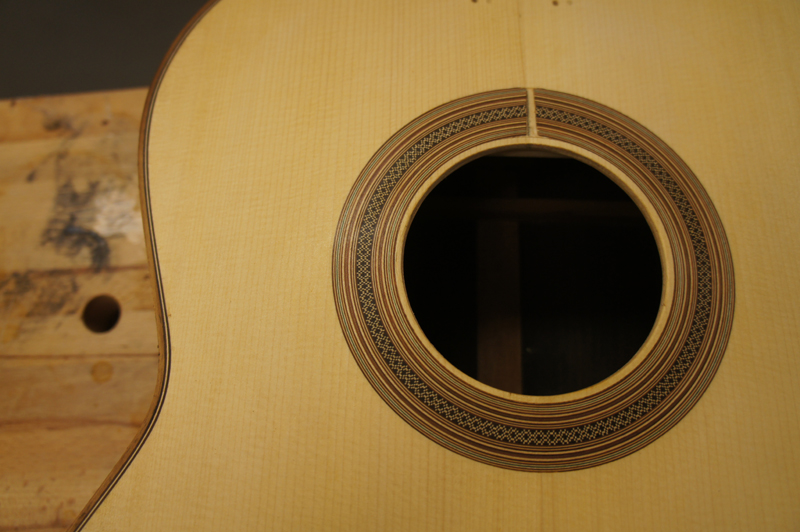
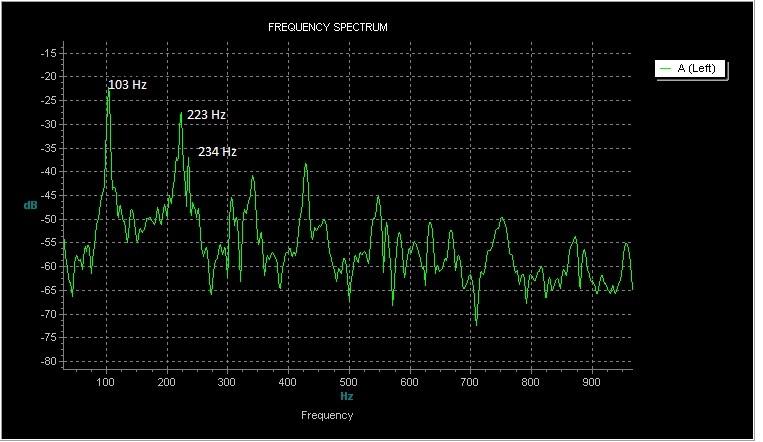
Acoustic PreparationBefore routing the binding I took the time to use a spectrum analyzer to get the resonance frequencies close. Now they're high, but with the bridge glued on the first resonance should drop to about 100 Hz and the main resonance to about 202 Hz. I've also mapped the entire top with a magic-probe.
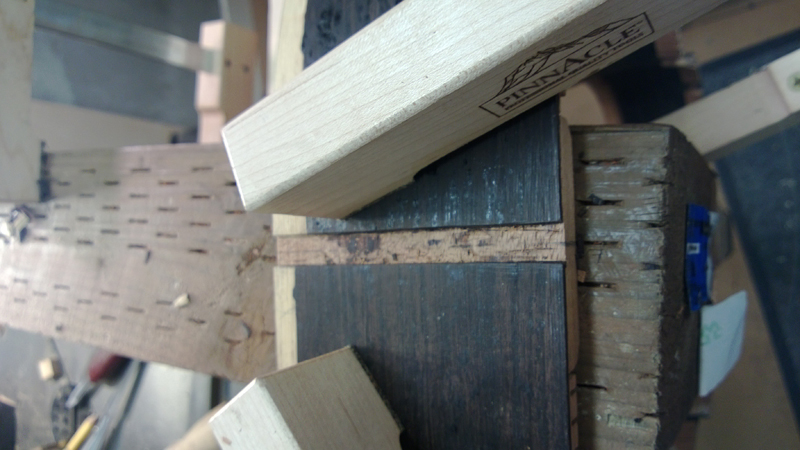
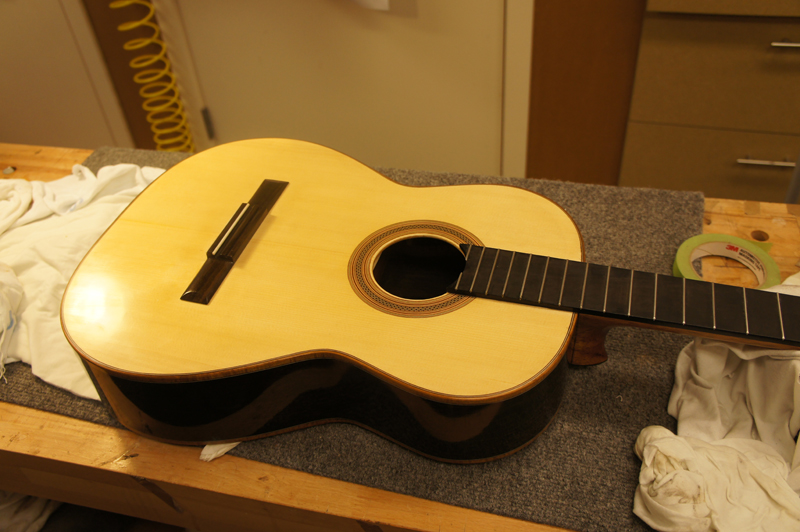
The bindings are Tasmanian Blackwood with BWB side purflings. I have a brown-white-brown purfling for the top to match the rosette.
Binding and purfling layout — Australian Blackwood on African Blackwood, BWB purflings
✦
July 3–4th, 2013 — Fretboard & Pore Fill
This is my 11th instrument — you would think I could glue on a fretboard. I prepared it for gluing, planing my 8mm board to between 5 and 6mm. Made a caul from 3/4" plywood, test-clamped everything, and it all looked great. I put a thin layer of LMI instrument glue and clamped with a full-size caul and a whole lot of cam clamps. I came back 15 minutes later and found the fretboard had warped so badly that the edges were actually lifting against the caul and the clamps. Yikes.
Fretboard Warp — FixI used a repair heat blanket to remove the fretboard. It was very warped. I used the same blanket and caul to heat and flatten it, cycling the heat three times over a couple of days until I had a flat fretboard again. To avoid repeating the problem I used structural epoxy to glue it on the second time.
I started cleanup work, crossing my fingers about avoiding the first dent or scratch in the top. I'm nearly at the point where I can cover the top through the Zpoxy pore fill.
One interesting correction: I cut the fret slots using an LMI template and noticed their serviced fretboard had the nut position 0.4mm longer than mine — compensated for kerf width. I had some black veneer at 0.5mm, glued it to the end of the fretboard with CA, and lightly sanded it smooth. I can no longer measure a difference between my fretboard and LMI's.
Fretboard finally on — epoxy, a caul, and patience
First coat of Zpoxy — the African Blackwood releases a lot of color; pre-sealing the light wood helped
✦
July 13th, 2013 — French Polish Begins
I have this guitar ready for French polishing. Pore fill complete, gaps spot-filled with CA, and a couple of thin coats of blonde shellac sprayed on as sealer. I also planed and sanded the fretboard both to level it and to achieve the correct string height at the bridge — I was pretty close from the prep work done before gluing on the fretboard.
On French Polishing — Robbie O'Brien's MethodI can't say enough about Robbie O'Brien's French polishing technique and online class. His method is the clearest, most straightforward, and most repeatable I've tried. He takes the magic out of the process and puts it in the results. What you get from Robbie that most demonstrations leave out is complete information — when to recharge the pad, what it's supposed to feel like, what happens when things go wrong and how to correct it. As a luthier instructor by trade he knows how to demonstrate an action while anticipating and addressing a student's problems and filling in the missing details. His process breaks down each charge of the pad with shellac into a discrete and repeatable set of actions. I think there is true value in the instructional content he produces and am happy to pay for it.
After just one session — the African Blackwood glows
✦
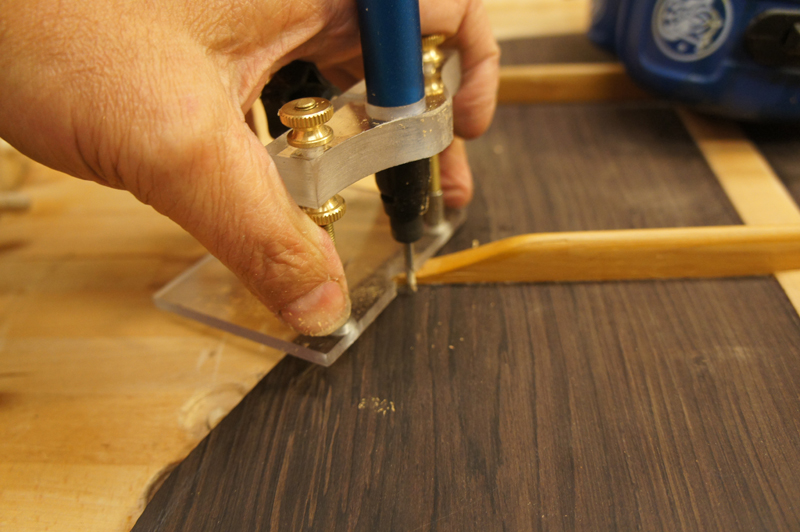
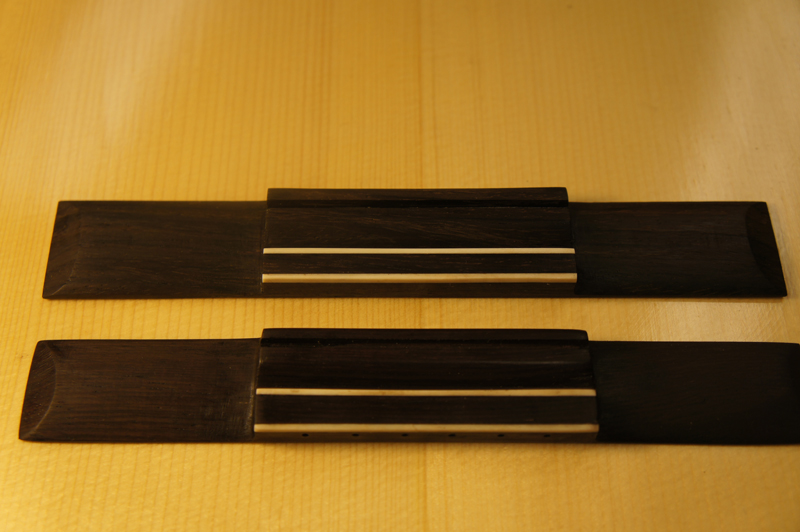
July 19th, 2013 — Carving the Bridge
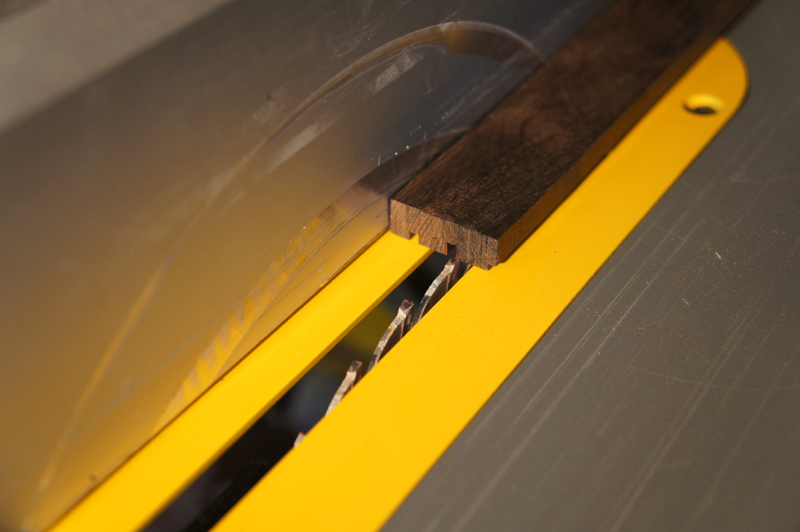
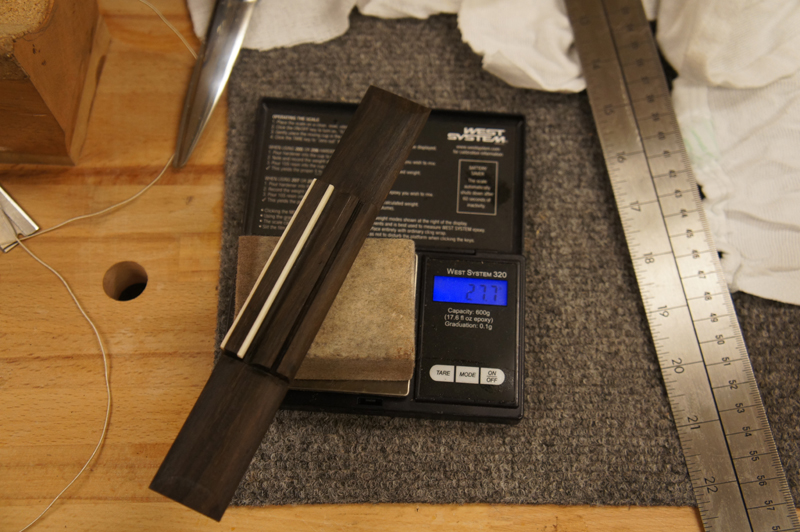
I've never carved a classical bridge before and I had a nice block of what the eBay seller called Brazilian Rosewood — it's not, but it's a beautiful piece and when carved came in just above 25 grams. I also had a backup LMI bridge in East Indian Rosewood. Before trying to carve I watched Robbie O'Brien's lesson on it.
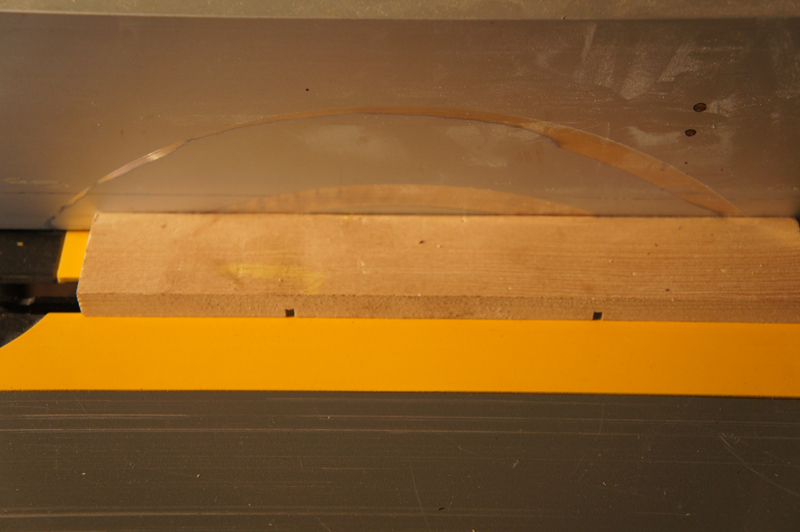
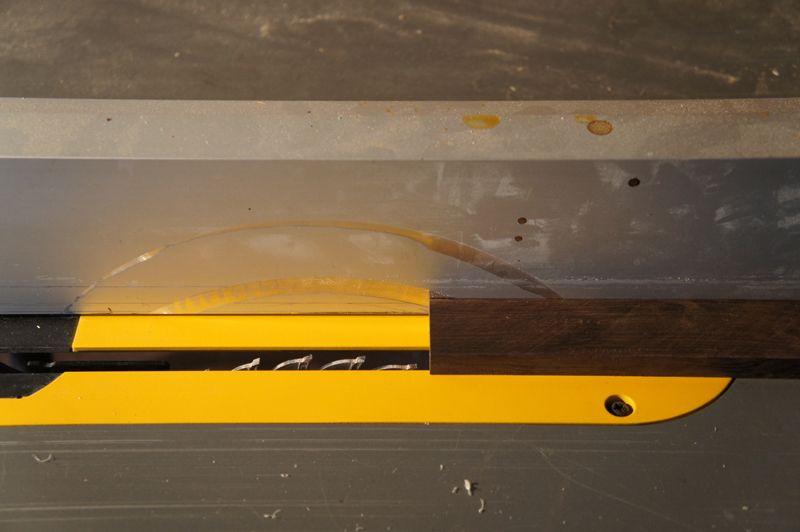
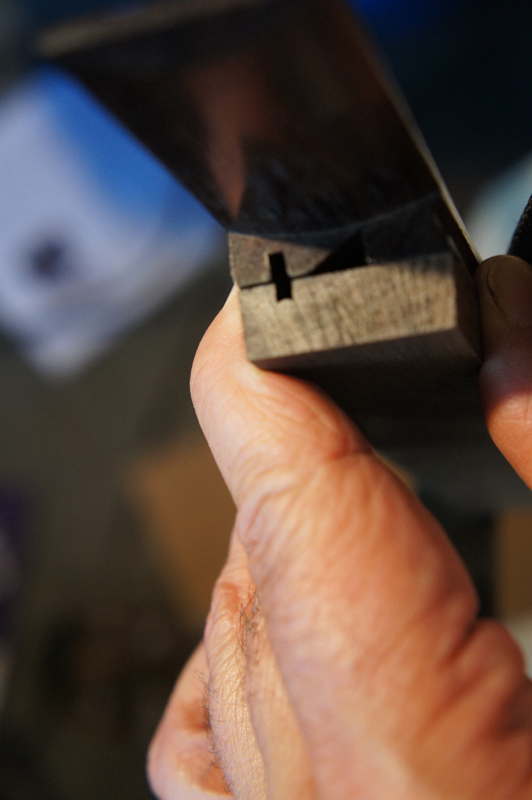
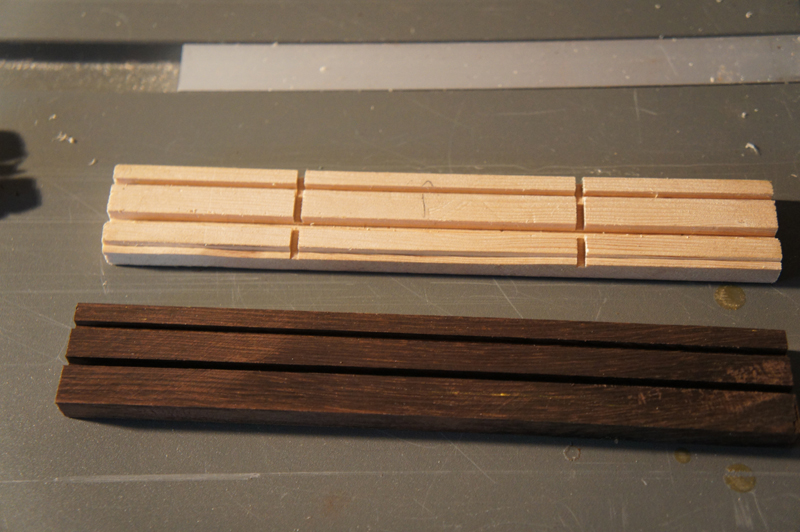
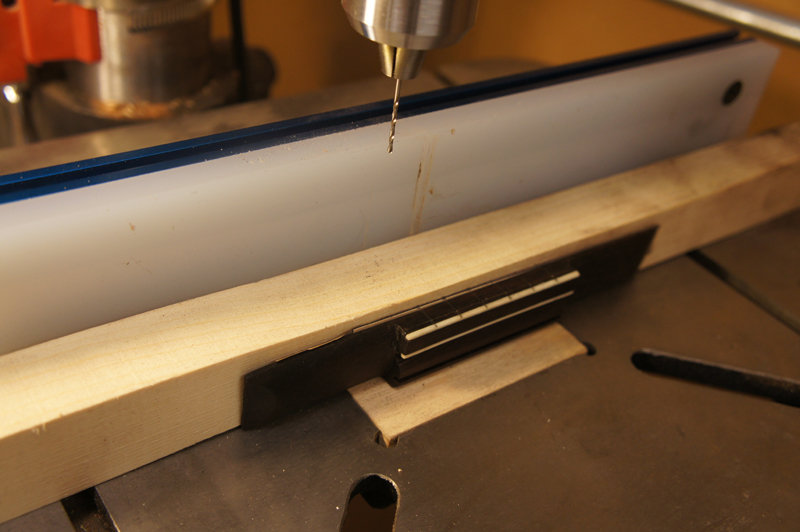
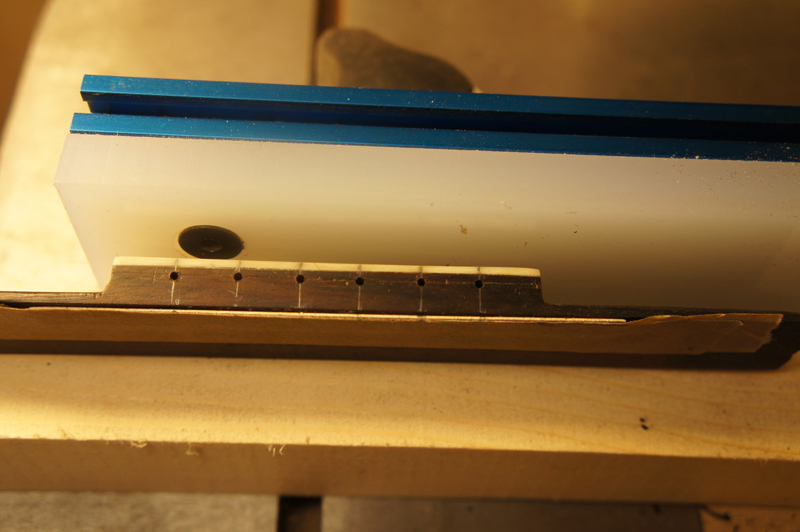
The first step was building a cutting jig. This forced me to set up my circular saw and practice before hitting the good wood. I used the LMI bridge as a guide for cut placement — a 3mm cut for the saddle, a 4mm+ cut for the valley between saddle block and tie block, two 2mm × 2mm cuts on the tie block for a bone strip, and two horizontal cuts the same depth as the valley cut to mark the wings.
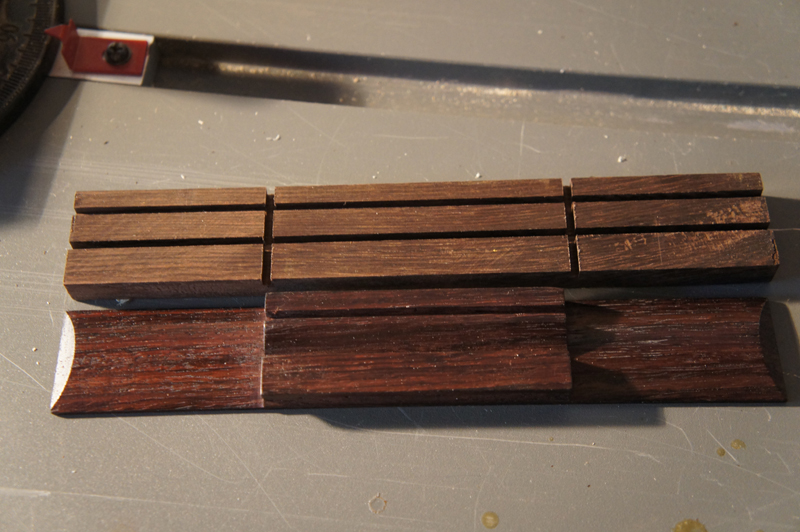
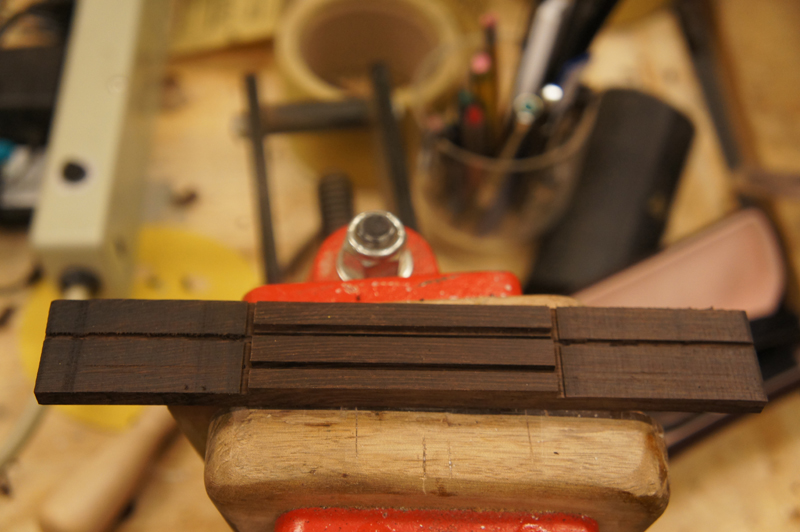
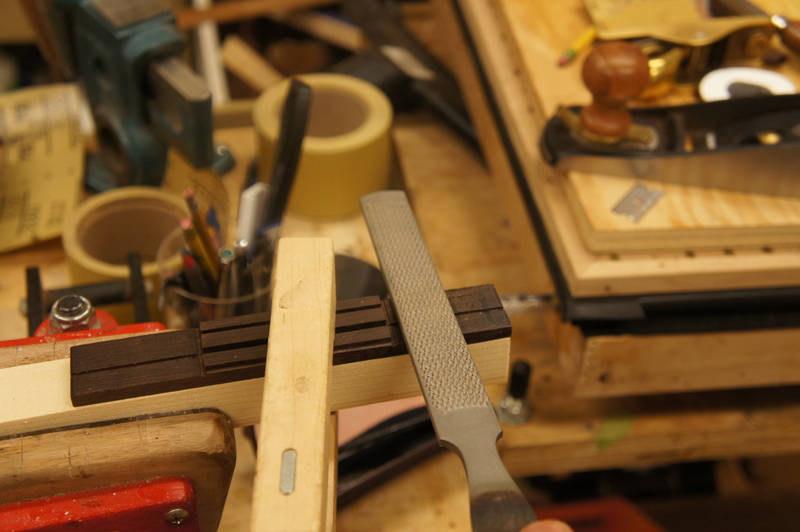
I used the bandsaw to remove the bulk of the wood and found a cheap Nicholson two-sided rasp with a safe edge — one I never liked for necks — was a dream for this job. I carved a curve until I went past my cut depth, then used a sharp chisel to carve the valley (the BRW cut like butter in the right direction).
Lesson: Look Twice Before CuttingDon't ask about the nice strip of Tasmanian Blackwood. Let's just say: look twice to see which side of the bridge is against the fence when cutting for the bone strips.
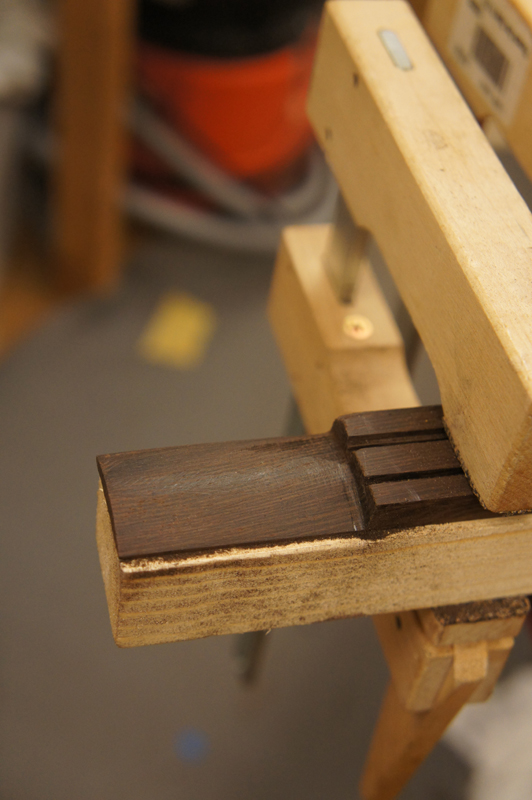
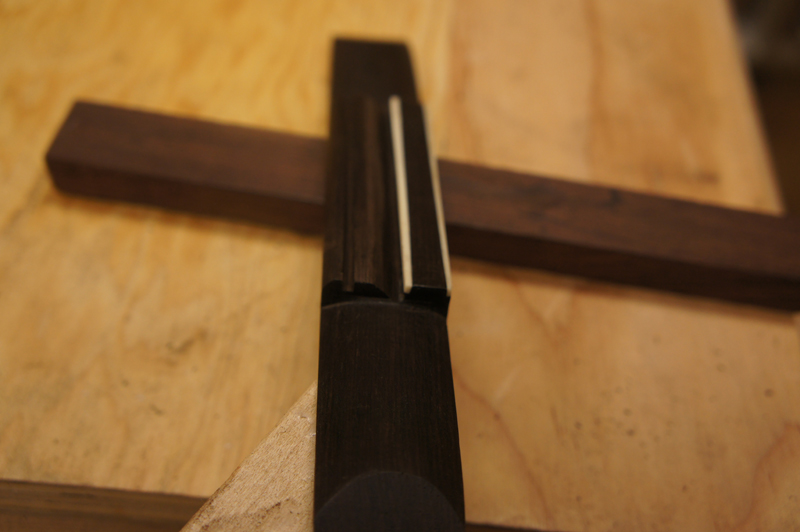
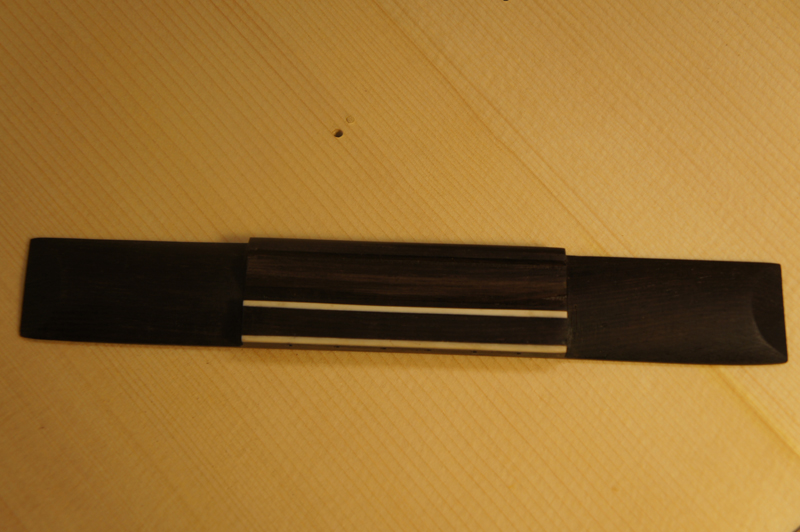
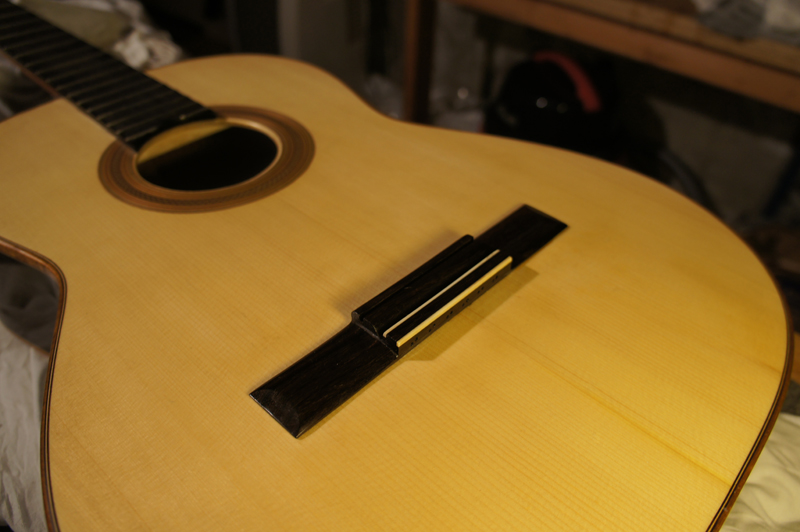
I went through the process a second time — on my first bridge I'd nicked a corner and fixed it with a slight taper on the wings, making the bridge asymmetrical. I could not let it go, so I pulled a new blank and carved a second bridge without the compromised wings.
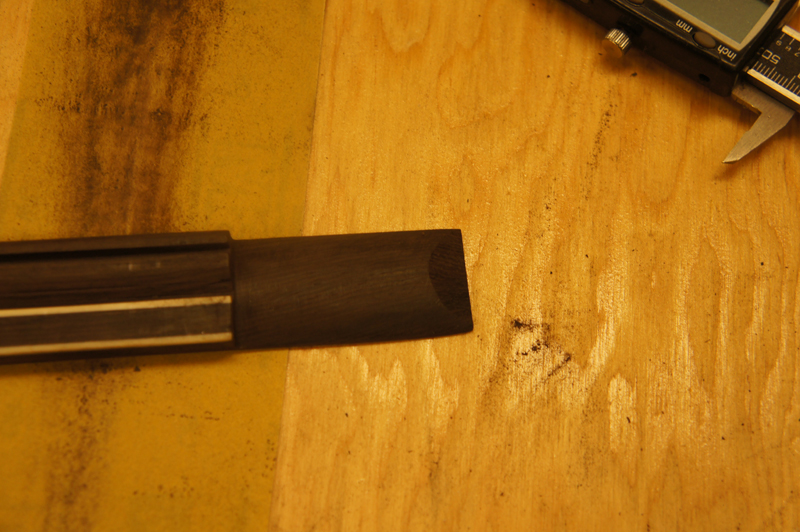
The final bridge — second attempt, correct hole pattern from the Hauser 1943 plan, symmetric wings
✦
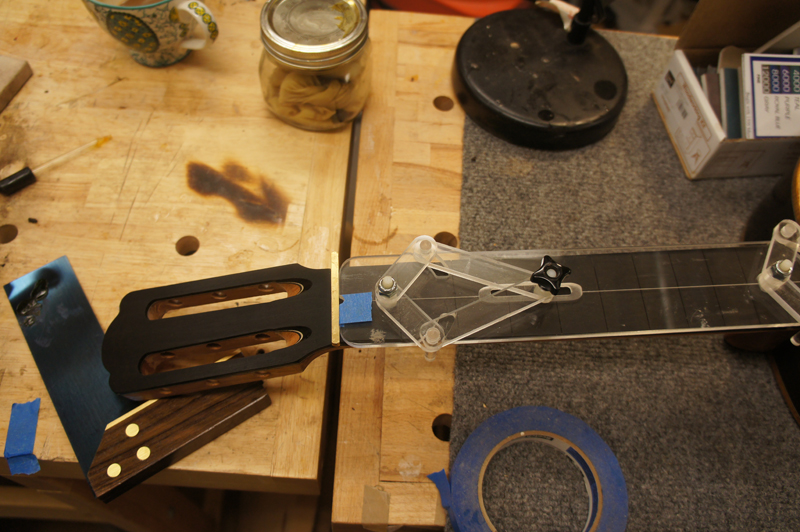
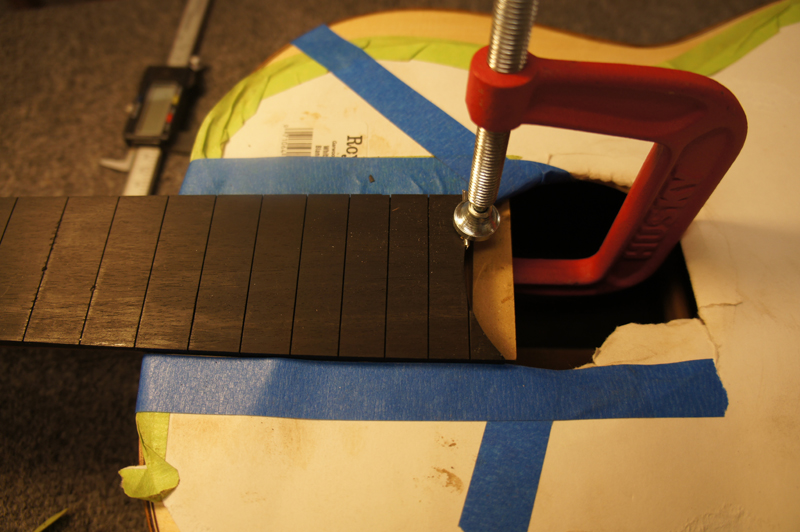
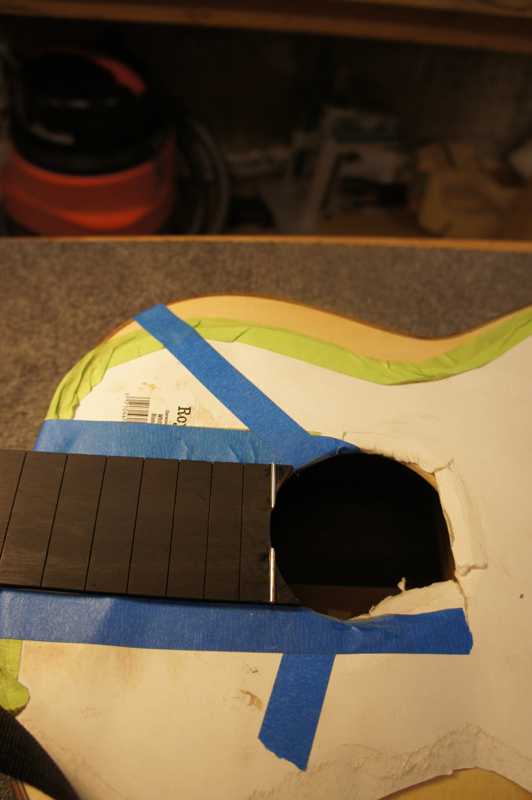
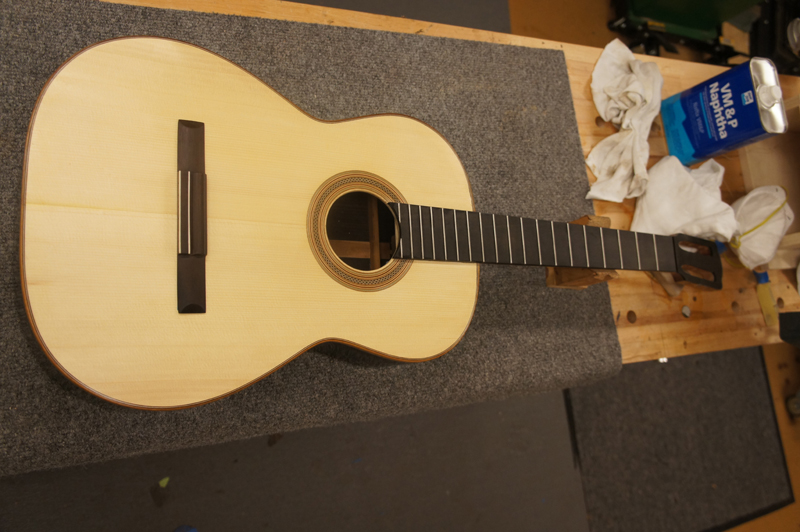
July 20th, 2013 — Bridge Placement & Fretting
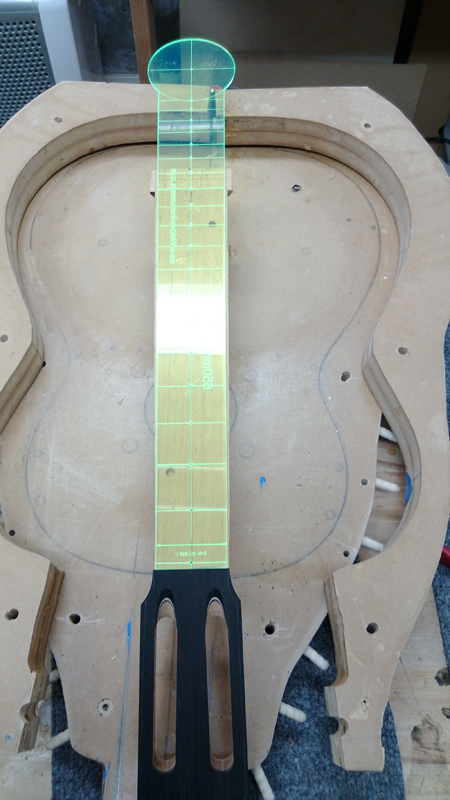
I still have a bit of French polishing to do on the back and sides, but I placed the bridge, fretted the guitar, and prepped the top for FP before going back to finishing. I used my luthier supplier's centerline tool to place and square the bridge to the neck, using a 1/4" brass bar to ensure the tool is at the nut position. A note of caution: double-check your fret measuring tool — my Ibex fret ruler's standard classical scale is not any standard I know, and it would have placed the bridge about 4mm too long.
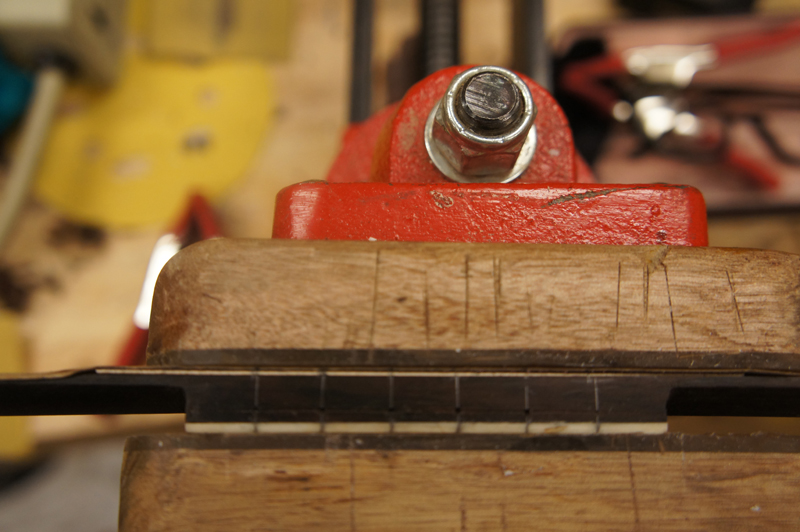
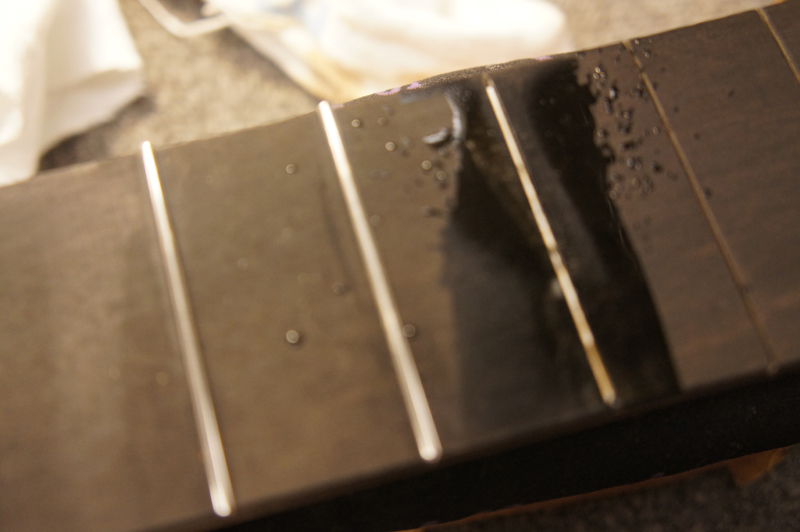
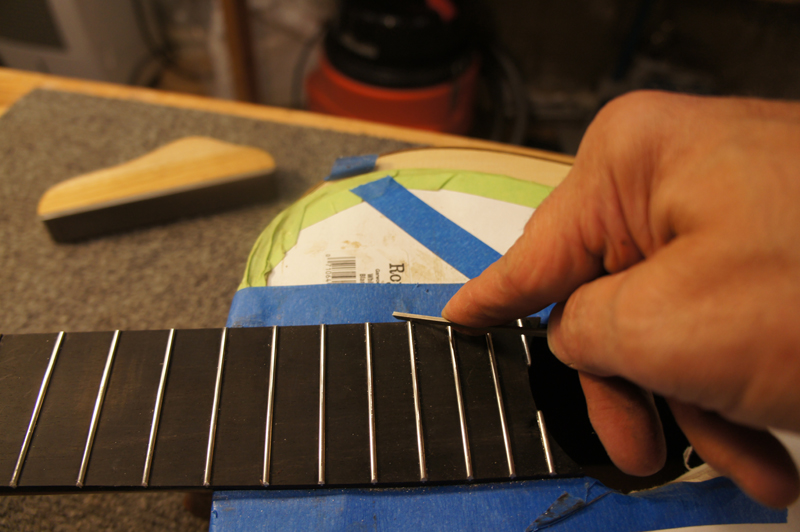
I was afraid to chip off the points of the two partial frets if I hammered them in, so I filed off the barbs, pressed them in, and super-glued them. I use a spray bottle and a bit of glue before pounding in the full frets, then a triangle file to bevel the edges. Because I leveled-sanded the fretboard in location, every single fret is touching the straightedge — no leveling or redressing needed.
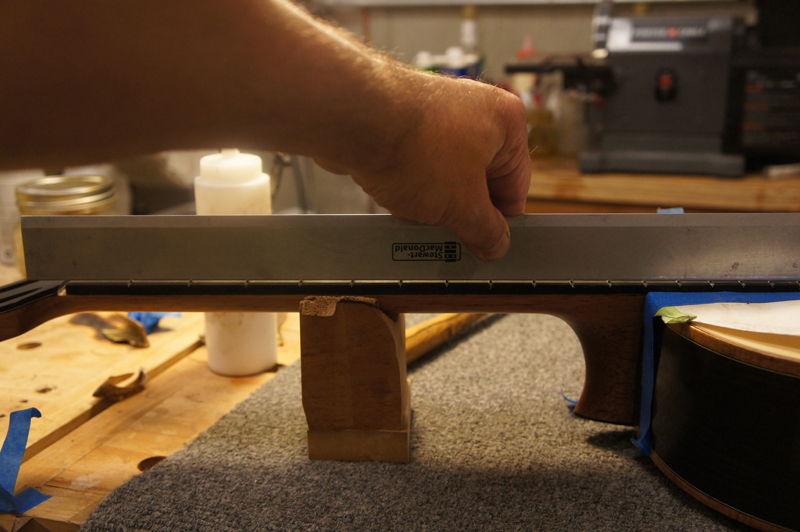
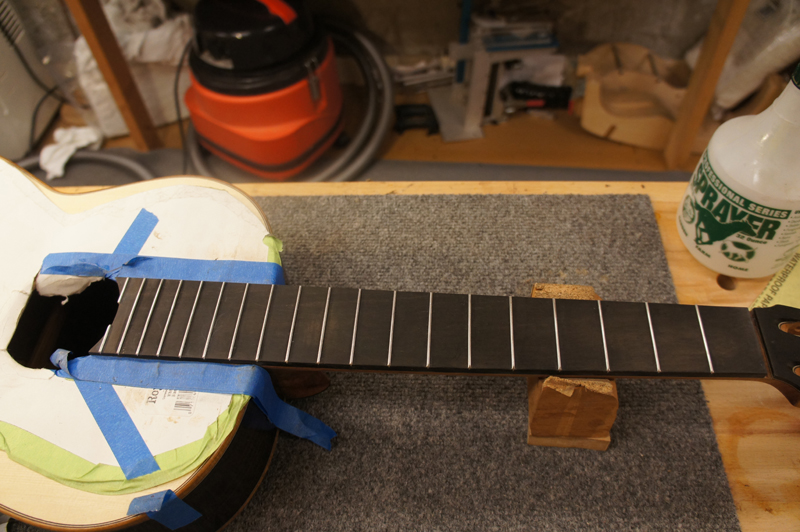
Every fret touching the straightedge — the payoff of leveling-sanding the fretboard in place
✦
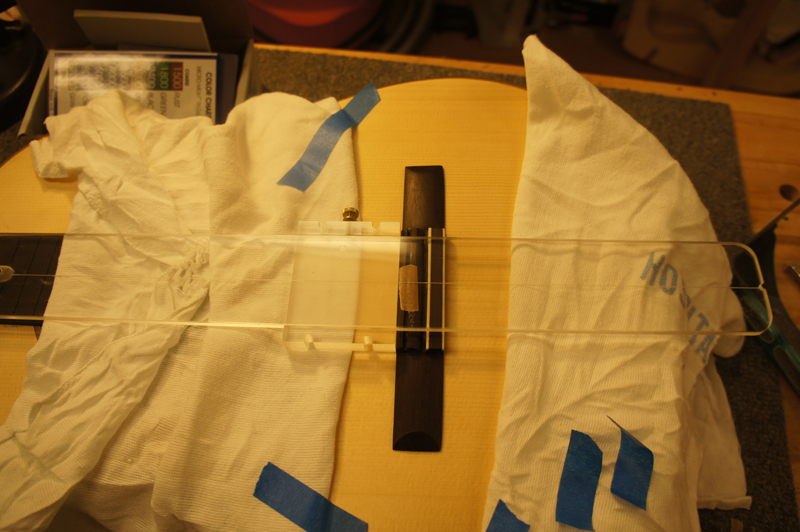
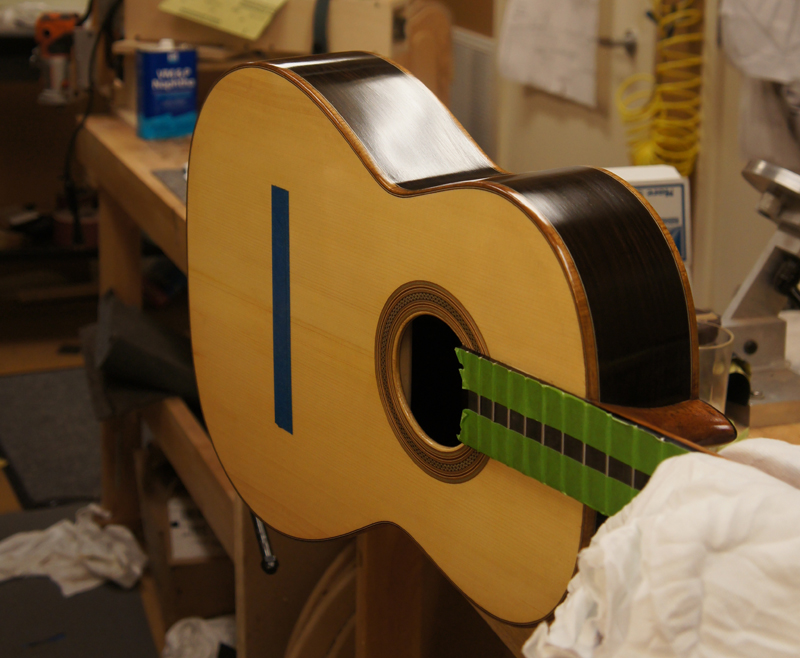
July 22–27th, 2013 — French Polish & Bridge Glue-Up
Getting a bit farther on the French polish.
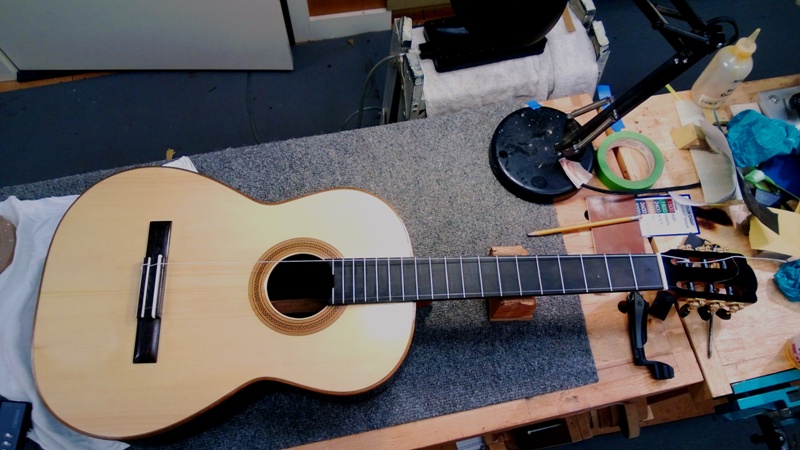
I used a vacuum clamp to glue on the bridge — probably should have waited another day or two, as the gasket really marred the FP in one area. I ended up sanding that area and have built the finish back up, but where I sanded it is slightly lighter than the surrounding wood. I'm leaving it for a week to see if the finish color matches better as it cures. I'm not above taking the whole top finish down and starting over.
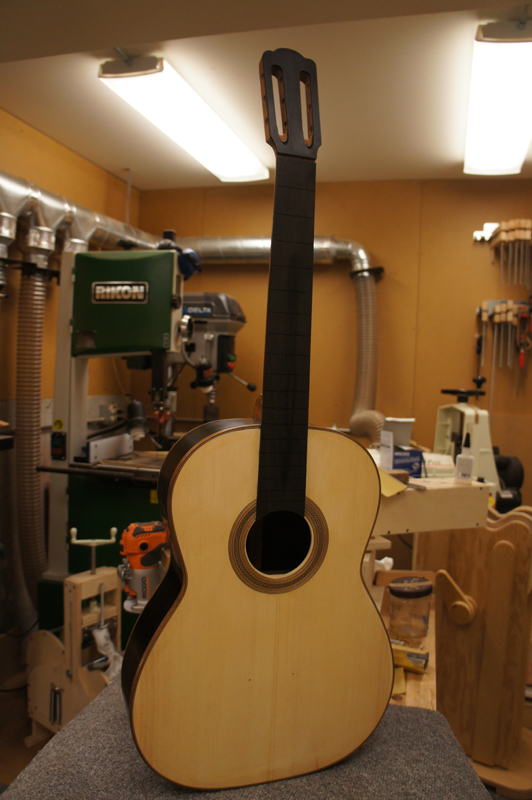
In any case I made a rough nut and saddle, strung the E strings, and got to hear the guitar. It sounds like it will be OK. All of my geometry is spot on so the guitar will set up nicely.
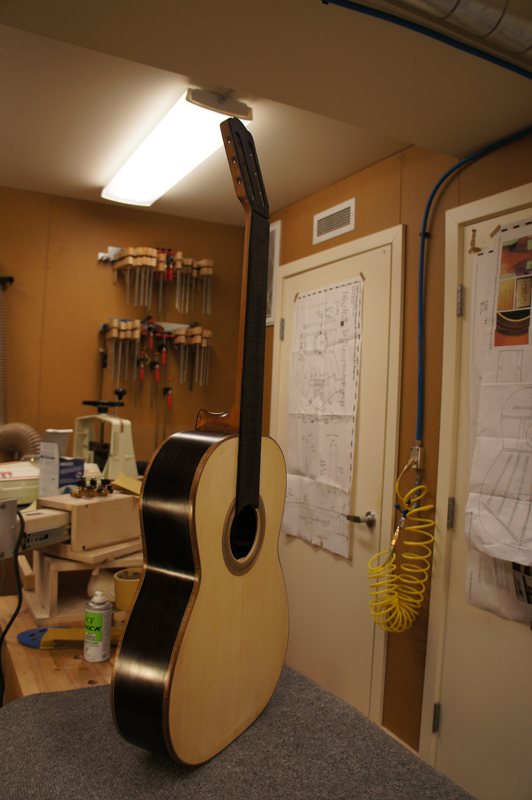
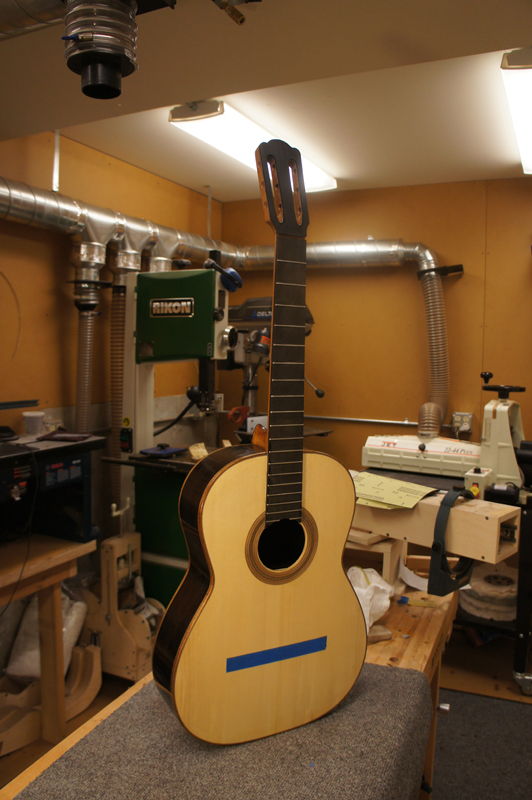
First strings — E strings on, geometry confirmed, and it sounds like it will be OK
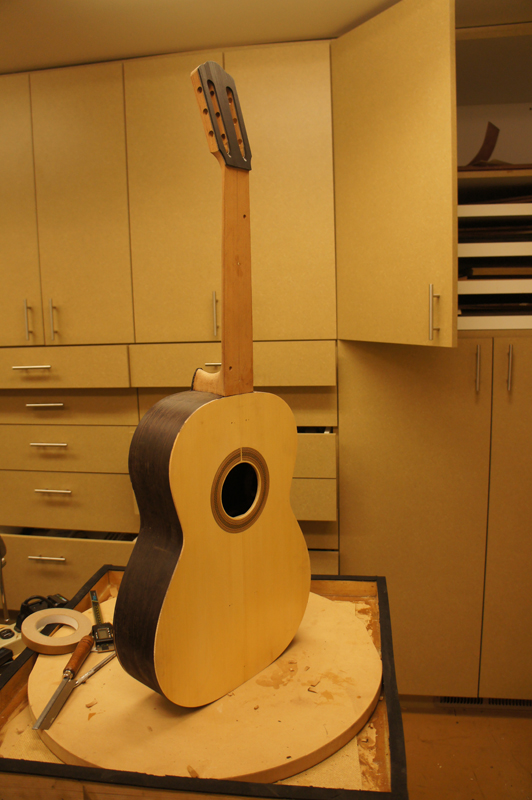
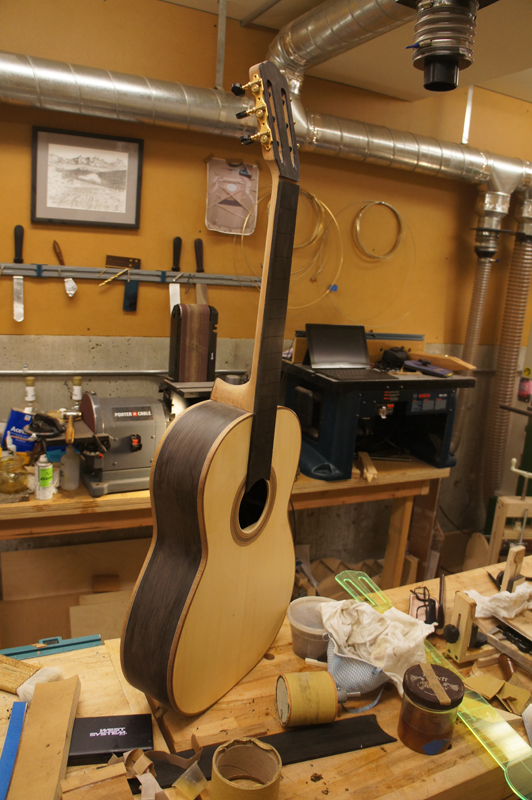
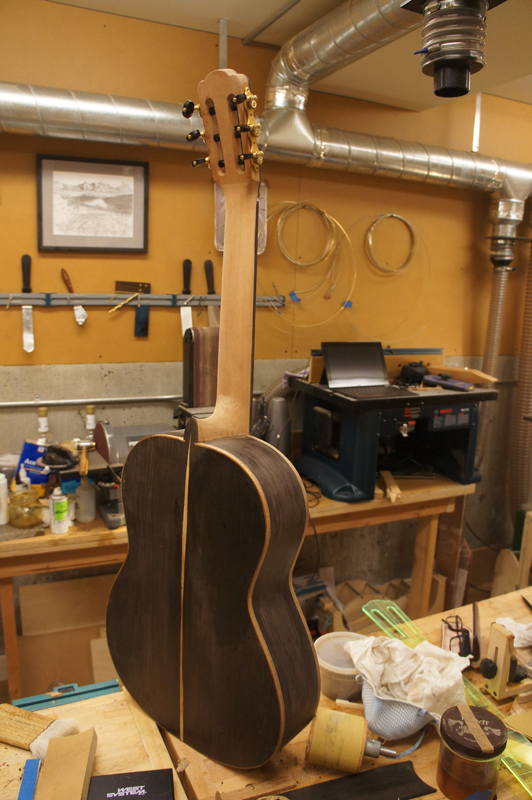
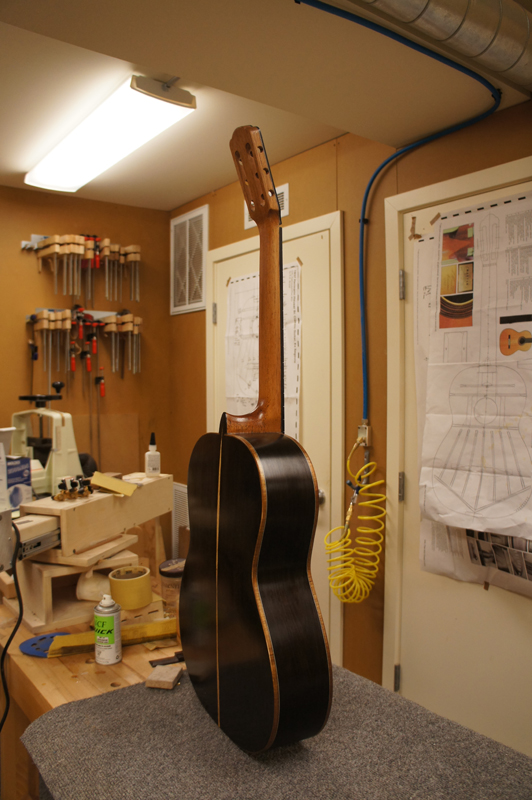
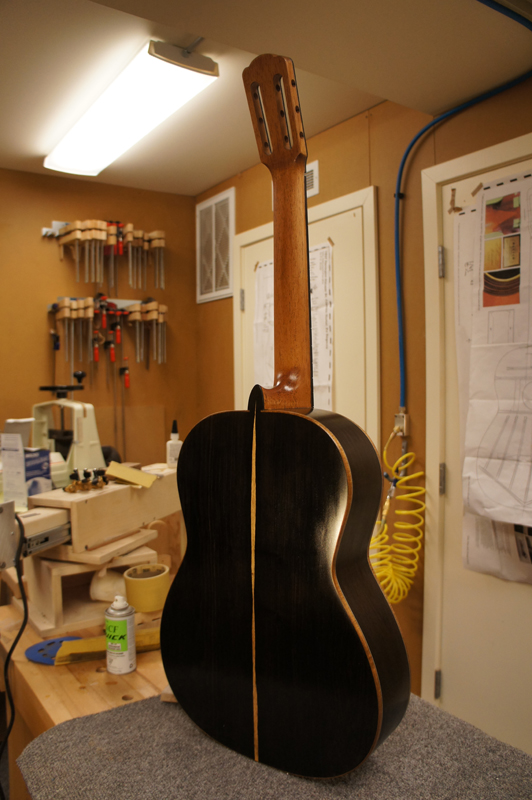
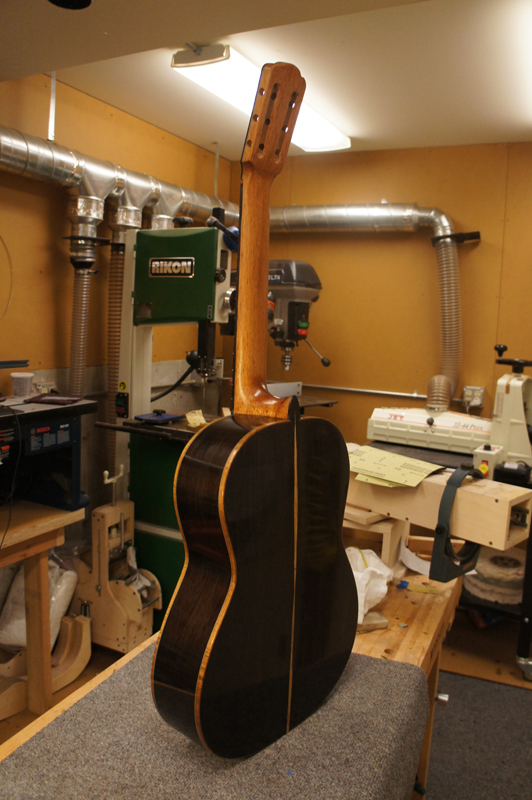
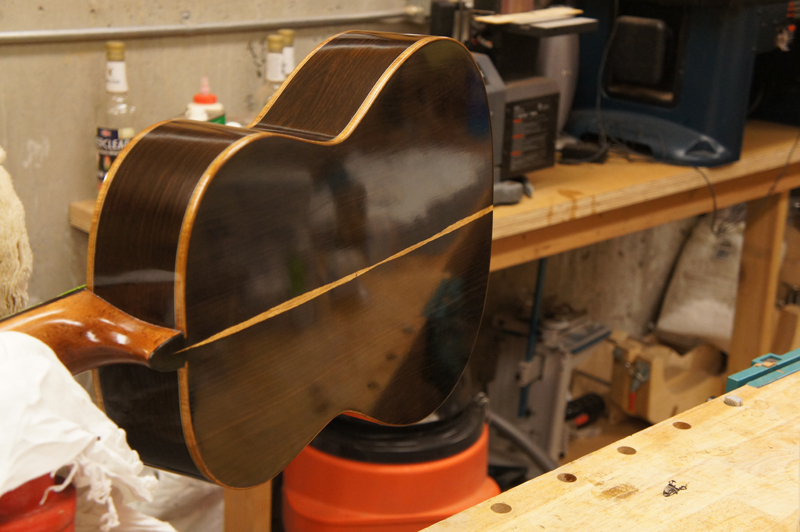
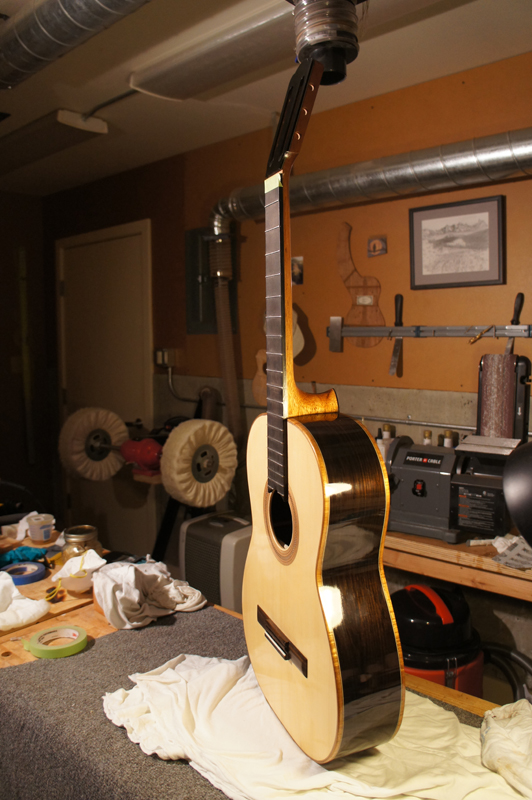
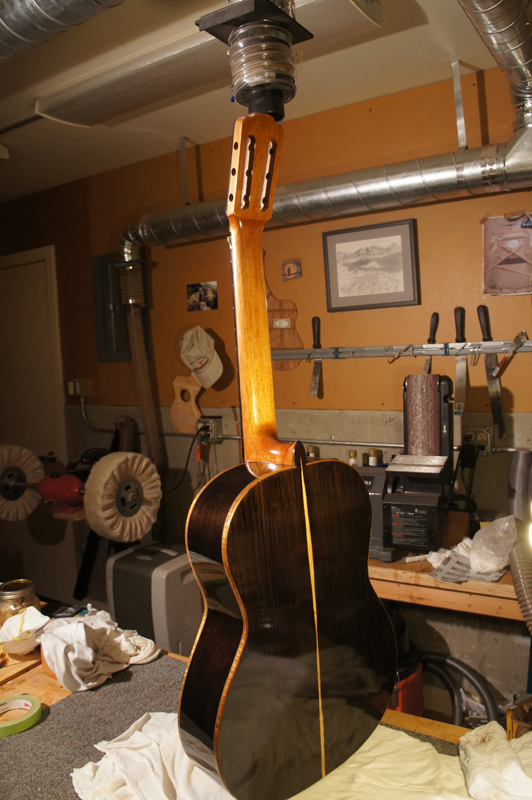
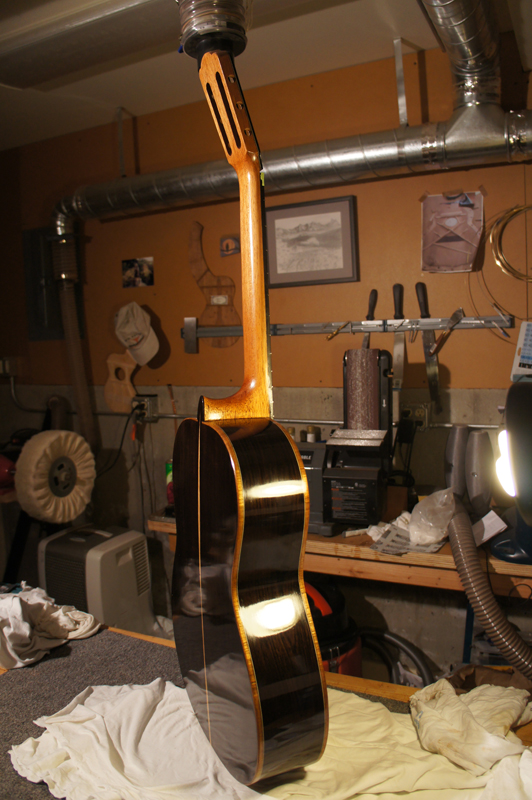
I finished the FP on the body today. Still a little work to do on the neck and headplate veneer, and after the finish cures for a day or two I'll hand buff. Here are a few pictures of how it turned out.
Body complete in French polish — the African Blackwood depth is extraordinary
✦
July 29th, 2013 — First Strings
I strung the guitar up tonight and was finally able to play it. As always it sounds rough at first, but I set the action, cleaned up the top of the saddle, and allowed the strings to stretch a bit so they could stay in tune at least partway through a tune — and it sounds good.
On the WoodsThe top is Red Spruce — an unusual choice for a classical. The bindings are Tasmanian Blackwood. The bridge is a rosewood of uncertain origin — the eBay seller called it Brazilian, but it isn't. In any case it's a beautiful piece of wood and came in just above 25 grams when carved. I also made the bridge 12-hole.
I still need to polish the top — just waiting a few days for the finish to cure. I'll post a video when I film it at the weekend.
✦
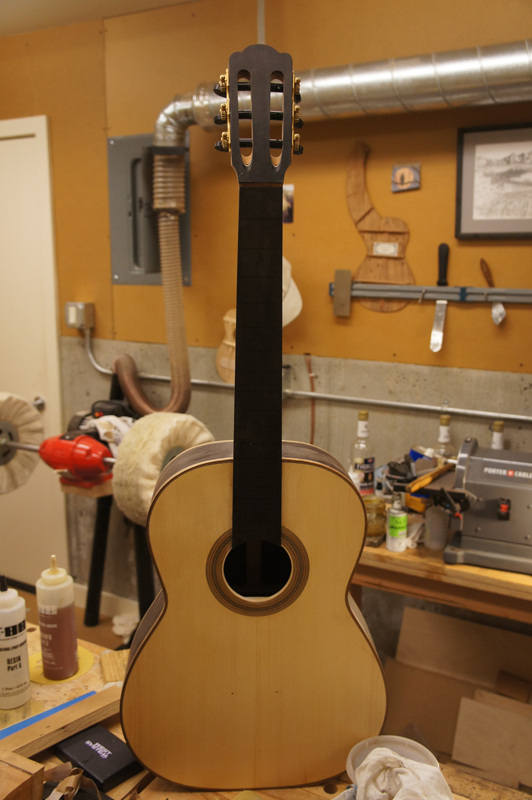
August 3rd, 2013 — Complete!
I finally polished and properly set up my classical guitar. I had one funny issue intonating: the B string was playing way flat at the 12th fret. I was nervous as I already had the string cutting near the top side of the saddle. I checked the saddle and nut carefully, found nothing wrong, changed the string — same brand — and the intonation was right on. I will forget it ever happened.
It sounds pretty good, but playing up the neck it's a little more percussive than I'd like. Maybe it will open up as it has just been set up — Red Spruce is an unusual top wood for a classical anyway. We'll see what happens with time. Overall I'm very happy with the results.
Complete — instrument #11, April through August 2013
✦
Final Specifications
African Blackwood Classical Guitar
DesignJeffrey Elliott modification of Hauser 1942
Instrument No.11th build
TopRed Spruce
Back & SidesAfrican Blackwood (Dalbergia melanoxylon)
Bracing PatternOpen harmonic bar fan brace — modified Hauser 1942
Fan Brace Heights6 / 5 / 4 / 3mm center to outer, graduated by stiffness
NeckSpanish heel, 2 mm forward tilt
BindingsTasmanian Blackwood
Top PurflingBrown-white-brown (matching rosette)
Side PurflingBWB
BridgeHand-carved rosewood — hole pattern from Hauser 1943 GAL plan
FretboardEbony — compensated nut
FinishFrench polish — Robbie O'Brien method
Target Resonances~100 Hz (first) / ~202 Hz (main) with bridge