Gore Medium Body Steel String Guitar blog:
April 2nd 2014
I have a few updates, thanks from some help on the Australian/New Zealand Luthiers Forum I found I had a small error in my equation for plate thickness. My error basically took the diagonal stiffness measurement out of the equation give me a slightly thicker plate.
So now my top plate target is 2.7 mm and my back (I want an active back) number is 2.5 mm. It did not make much difference on the top but it did make nearly a 10% difference on the back.
While preparing my primary braces for gluing I planed one lower then I the target height. I finished one brace, was starting on the other and got distracted and planed down the finished brace. Oh well. I got to try a new way to laminate these braces. I sliced and thickness three long 25mm by 1.7 mm german spruce strips. As before I bend them with my iron and a mist of water to close to the correct bend. This time though I used the inside cut out material from my mold to make a brace mold and used a strap clamp to pull the strips together. This technique was in the Gore\Gilet Build book.
.jpg) I waxed the mold and strap with paste wax but ultimately I also used wax paper when I laminated the strips with System 3 structural epoxy. The result was a perfectly shaped brace with no spring back.
I waxed the mold and strap with paste wax but ultimately I also used wax paper when I laminated the strips with System 3 structural epoxy. The result was a perfectly shaped brace with no spring back.
.jpg) I cut the 25 mm braces into two braces and used a plane to take them down to just a bit more than 7mm. The 7 mm is my target height for the brace before I shape them.
I cut the 25 mm braces into two braces and used a plane to take them down to just a bit more than 7mm. The 7 mm is my target height for the brace before I shape them.
.jpg) I laid out the braces and the bridge plate on the top in my modified 32' Radius dish I drilled four index holes in the dish so that I can use them to index the top, the bridge plate and the braces during glue up.
I laid out the braces and the bridge plate on the top in my modified 32' Radius dish I drilled four index holes in the dish so that I can use them to index the top, the bridge plate and the braces during glue up.
.jpg) With every thing in place I marked where I need rebates in the primary braces. Also I tested out using thinned Teflon strips to center the braces between the peg holes.
With every thing in place I marked where I need rebates in the primary braces. Also I tested out using thinned Teflon strips to center the braces between the peg holes.
.jpg)
.jpg) No excuses now I needed to take epoxy to my relatively clean top. I got every thing I was going to need close to my go bar deck. This included a piece of carbon fabric I cut for under the bridge plate and three (one extra) fibers or yarns from the weave of the carbon fiber for under the braces.
No excuses now I needed to take epoxy to my relatively clean top. I got every thing I was going to need close to my go bar deck. This included a piece of carbon fabric I cut for under the bridge plate and three (one extra) fibers or yarns from the weave of the carbon fiber for under the braces.
.jpg) I mixed up a cup of West System 105\106 epoxy for the glue up. I used a brush to wet the top along the brace path and the area marked for the bridge plate. I applied epoxy to the strips just enough to wet them and laid them down in the center of the brace locations.
I mixed up a cup of West System 105\106 epoxy for the glue up. I used a brush to wet the top along the brace path and the area marked for the bridge plate. I applied epoxy to the strips just enough to wet them and laid them down in the center of the brace locations.
.jpg) Sorry for the lack of pictures I has epoxy on my gloves. I also applied epoxy to the carbon fabric shaped for the bridge plate and put that down. I used a pointer to push open the fabric and inserted my 3/16 pins I am using for indexing. I pushed the bridge plate and followed with the two braces. Go-bars on every thing, my spacer strips between the braces and the index pins . So now I either have a complete mess or tomorrow I will have a top with epoxied primary braces.
Sorry for the lack of pictures I has epoxy on my gloves. I also applied epoxy to the carbon fabric shaped for the bridge plate and put that down. I used a pointer to push open the fabric and inserted my 3/16 pins I am using for indexing. I pushed the bridge plate and followed with the two braces. Go-bars on every thing, my spacer strips between the braces and the index pins . So now I either have a complete mess or tomorrow I will have a top with epoxied primary braces.
.jpg) While waiting for the epoxy to cure. I finished my two side bending molds. I again used what is probably a common technique but one I got from the build book to drill the holes close to edge of my bending form.
While waiting for the epoxy to cure. I finished my two side bending molds. I again used what is probably a common technique but one I got from the build book to drill the holes close to edge of my bending form.
.jpg)
.jpg)
.jpg)
April 4th 2014
Moving on, I waited to the following morning and remove the go-bars. The brace seems to be epoxied on well and carbon stayed under brace. I can say that carbon fiber hardware with epoxy make wicked splinters. Luckily I have my magnifying glasses and some good tweezers.
I cut the remaining braces and prepared for the next epoxy glue up. The primary falcate braces and the sound hole braces inlet into the upper transverse brace. While I will not glue the upper transverse until I have all of the other braces glued on. I still cut the rebates.
.jpg)
.jpg) I traced all of the braces so I will know where to put the carbon fiber.
I traced all of the braces so I will know where to put the carbon fiber.
.jpg) Then back to the go-bar deck. I have gotten pretty neat with with LMI glue but I am a mess with this epoxy. Maybe if I did not use my gloved fingers as squeegees for the fibers I would be a bit neater. While gluing down one of the falcate braces I did need to lift it, remove excess epoxy and relay it as a bit of the carbon squirted out. The was no problem gluing all the braces seen in the working time of the epoxy.
Then back to the go-bar deck. I have gotten pretty neat with with LMI glue but I am a mess with this epoxy. Maybe if I did not use my gloved fingers as squeegees for the fibers I would be a bit neater. While gluing down one of the falcate braces I did need to lift it, remove excess epoxy and relay it as a bit of the carbon squirted out. The was no problem gluing all the braces seen in the working time of the epoxy.
.jpg)
.jpg)
.jpg)
.jpg) Having to wait for the epoxy I started to think about the back and thought it would help to have a 10 foot radius stick. No need for a shipwright compass as my wife is a designer with a large format printer at home. I made two arcs and used more scrap from my body mold to make the radius block. In one of the pictures you can see the difference between a 15' and a 10' radius. The plans actually calls out a 3 meter radius dish but the 10' is close; 118" vs 120" My dish is schedule to arrive Wednesday. I want to use the dish to make an accurate side profile before bending the sides.
Having to wait for the epoxy I started to think about the back and thought it would help to have a 10 foot radius stick. No need for a shipwright compass as my wife is a designer with a large format printer at home. I made two arcs and used more scrap from my body mold to make the radius block. In one of the pictures you can see the difference between a 15' and a 10' radius. The plans actually calls out a 3 meter radius dish but the 10' is close; 118" vs 120" My dish is schedule to arrive Wednesday. I want to use the dish to make an accurate side profile before bending the sides.
.jpg)
.jpg)
April 5th 2014
The build book from Contemporary Acoustic Guitar Design and Build Trevor Gore with Gerard Gilet has really good picture of everything I am doing and much better descriptions. I guess if anything this blog shows a relatively novice builder going through the procedure.
I carved down all the braces I have epoxied down. The falcate braces are about 7 mm around the bridge and simply taper to about 5 mm near the upper transverse brace. On the tail end of the guitar the braces taper down to zero. I was looking at my two side braces and they really looked clunky. Whoops they were 7 mm wide instead of 5 mm. A sharp chisel took care of that error no problem. I also noticed I forgot the lower tertiary brace. no problem as I still have three epoxy sessions. One to put carbon fiber on all of the finished braces. One to glue down the upper transverse brace and lastly to top the upper transverse brace with carbon fiber.
Here is my top with the carbon fiber on the finished braces and gluing down the forgotten brace. I go back and look at the pictures in the book and Trevor's epoxy work with the carbon sure looks cleaner than mine.
.jpg)
Next I need to build a gluing caul for the UTB. This design knocks a bit of curve to make the neck angle work out. The book list out a procedure to make it. I think I will draw it in my cad program and print it out.
April 6th 2014
I carved out a caul for the upper transverse brace with a cabinet scraper. The caul was 400mm long and was dished to about 1.4 mm flattened in the fret board extension area. It seemed like around 40' radius with the fret board area flattened. I planed in the profile to the brace and touched it up on the caul. Also I laid down some carbon fiber before epoxying the brace to the top.
.jpg)
.jpg)
April 12th 2014
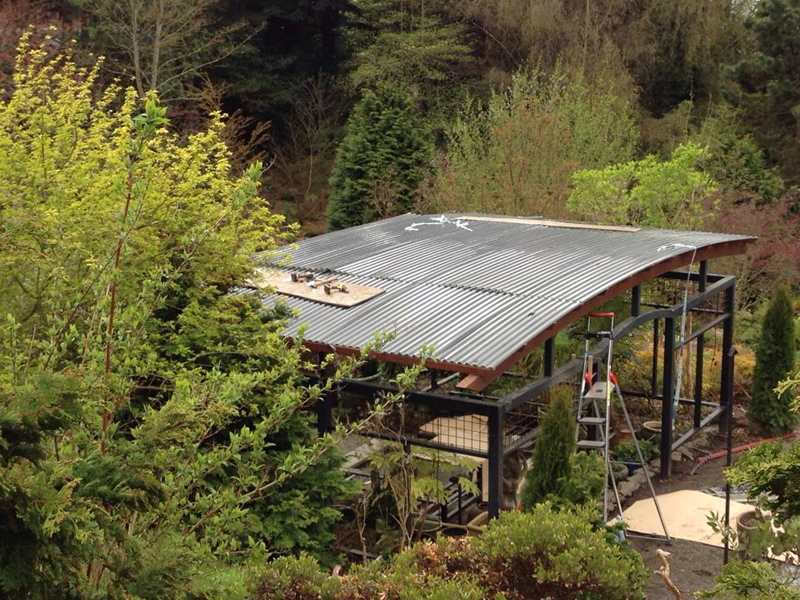
I had to slow down a bit. The last few days I had to keep peace in the household come up out of the shop and installed a poly-carbonate roof on our all steel pergola in my wife's garden. :| She is a landscape designer by trade, if I am not careful she will have me working full time.
.jpg)
 I did find one reward to working outside, a small batch of morel mushrooms for a tasty snack.
.jpg) I finally made it back in the shop Friday and got the sides bent. There is a pretty tight bend for the cutaway.
I finally made it back in the shop Friday and got the sides bent. There is a pretty tight bend for the cutaway.
First I had a bit of prep work. I used a 10' radius dish I am using for the back radius to make an accurate template of the profiled sides. I put a strip of poster board into the mold on top of the radius dish and used a pencil in a small bit of wood to trace the curve of the radius board on to the poster board. from the neck and tail side of the curve, I measured up the depth of the body, plus a 10 mm, drew a straight line for the top and cut out the profiles. I leave the top flat has I will use it as a reference when I am first setting the rims in the mold.
.jpg)
.jpg) I cut out the side profiles and then used my drum sander to thickness both sides to 2.2 mm. I used a scraper to thin the cutoff side from above the waist to 1.9 mm so I would have a chance of bending them.
I cut out the side profiles and then used my drum sander to thickness both sides to 2.2 mm. I used a scraper to thin the cutoff side from above the waist to 1.9 mm so I would have a chance of bending them.
I took extra care was to keep track of the top and outside of each side so that I would not bend the asymmetrical sides for a left handed guitar. I must have checked this 10 times. I did once end up with a sides for a left handed harp ukulele.
.jpg) As the profile for this guitar has different proportions for the upper and lower bouts I found I had to drill a new set of holes in my bender to put the cutaway press in the correct space.
As the profile for this guitar has different proportions for the upper and lower bouts I found I had to drill a new set of holes in my bender to put the cutaway press in the correct space.
.jpg) Also notice the band clamp. The last time I did a Florentine cutaway the spring back on the sides was scary. This time as I loosened the cutaway press I tightened the clamp holding down the lower sheet of spring steel.
Also notice the band clamp. The last time I did a Florentine cutaway the spring back on the sides was scary. This time as I loosened the cutaway press I tightened the clamp holding down the lower sheet of spring steel.
.jpg) . .
.jpg) .
All and all it tuned out ok. I had a bit of fibers tearing away on the inside. I used a bit of CA to fix. .
All and all it tuned out ok. I had a bit of fibers tearing away on the inside. I used a bit of CA to fix.
Amazingly, the guitar rims fits in the mold. I think I will find a very bendable wood for the bindings. The last one I did I used ebony, it only took 10 or so strips to bend 2 without cracking.
.jpg) I do use supersoft II and it helps. I am getting better on the bending iron. It is a matter of patience and feeling when the wood is ready. With the curves learning where to bend start bends. I really should have been making the heel and tail blocks but I wanted to get a feel if I could pull off the laminated linings. I have a whole stack of practice sides that I bought once for bindings and linings. Included in that stack were an orphan Honduras Mahogany and a mahogany side. So I cut up and bent three 2.2mm thick strips of Honduran mahogany on my bending iron to laminate for the linings. The last strip sure was tight. I got better as I did them. I actually found that they bent better dry than wet. I might try the mahogany side as well. Although I think these will work.
I do use supersoft II and it helps. I am getting better on the bending iron. It is a matter of patience and feeling when the wood is ready. With the curves learning where to bend start bends. I really should have been making the heel and tail blocks but I wanted to get a feel if I could pull off the laminated linings. I have a whole stack of practice sides that I bought once for bindings and linings. Included in that stack were an orphan Honduras Mahogany and a mahogany side. So I cut up and bent three 2.2mm thick strips of Honduran mahogany on my bending iron to laminate for the linings. The last strip sure was tight. I got better as I did them. I actually found that they bent better dry than wet. I might try the mahogany side as well. Although I think these will work.
.jpg)
.jpg)
.jpg)
April 16th 2014
I made a bit of progress the last few days. This post will show my work to make the neck block for the bolt on bolt off neck joint and the tail block. The tail block is glued in with LMI glue and the neck block is currently clamped up while the structural epoxy I used is curing. More about the glue up further down the post.
The bolt on bolt off neck block needs to support a neck extension that will be routed in to the neck block. Also the block needs to be profiled to match the Venetian cutway side. Here is a picture of the completed blocks.
.jpg) My first minor issue to make the neck block was to get a thick enough block of wood (I am using mahogany ) thick enough but with the a wide enough face to make the extension block. I have a lot of mahogany, but ultimately I needed to resaw and joint a thicker block.
My first minor issue to make the neck block was to get a thick enough block of wood (I am using mahogany ) thick enough but with the a wide enough face to make the extension block. I have a lot of mahogany, but ultimately I needed to resaw and joint a thicker block.
.jpg)
.jpg) I glued the extension to a more typical sized neck block that would be used with a typical bolt on neck.
I glued the extension to a more typical sized neck block that would be used with a typical bolt on neck.
.jpg) To get the correct profile on the block I made a template of the blocks face.
To get the correct profile on the block I made a template of the blocks face.
.jpg)
.jpg) I transferred the profile to the glued on neck block and rough cut it on the band saw. I then also trimmed the block to fit the transverse brace. I do not have a picture but I cleaned up the neck block in a drum sander I had chucked in a drill press.
I transferred the profile to the glued on neck block and rough cut it on the band saw. I then also trimmed the block to fit the transverse brace. I do not have a picture but I cleaned up the neck block in a drum sander I had chucked in a drill press.
.jpg)
.jpg)
.jpg) Pretty close fit!
Pretty close fit!
.jpg) The tail block is just birch plywood with wings sanded using my luthiers friend.
The tail block is just birch plywood with wings sanded using my luthiers friend.
.jpg) The work took a toll on my shop.
The work took a toll on my shop.
.jpg) Bunches of clamps later I glued in the tail and am currently epoxying the nexk block on. My joint for the neck block was pretty tight and I probably could of just used LMI white glue. But it was such a complicated shape to clamp I though the add advantage of structural epoxy fill here or there would not hurt.
Bunches of clamps later I glued in the tail and am currently epoxying the nexk block on. My joint for the neck block was pretty tight and I probably could of just used LMI white glue. But it was such a complicated shape to clamp I though the add advantage of structural epoxy fill here or there would not hurt.
.jpg)
.jpg) There were a lot of clamps used for the neck block
There were a lot of clamps used for the neck block
.jpg)
.jpg) Also somewhere a long the line I bent the lines for the non-cutaway side. I did not have enough Honduran mahogany and used just mahogany instead for the two inside strips. It sure is a lot easier bending Honduran mahogany. I was sort of proud after the cutaway bindings. Now I know I still need practice.
Also somewhere a long the line I bent the lines for the non-cutaway side. I did not have enough Honduran mahogany and used just mahogany instead for the two inside strips. It sure is a lot easier bending Honduran mahogany. I was sort of proud after the cutaway bindings. Now I know I still need practice.
.jpg)
Next Page
| 